

在一陣雲端硬碟大戰下,Google也加入這場戰局,昨天梅干才提出申請試用,今天一早就收到啟用通知,對於Google的服務,梅干一向很有信心,雖然最近SkyDrive動作頻頻,但在先前遭無預警的停權後,使得梅干對於SkyDrive一點興趣也沒,而把檔案放在雲端就有一定的風險外,被無預警停權,這是當令人感到頭痛的一件事,所以除了放的好也要放的巧,而一早梅干立即就來體驗Google Drive,發現它的雲端硬碟與DropBox、Box.Net、SkyDrive有相當大的不同,現在就一塊來看看Google Drive的雲端硬碟吧!
Google Drive:
透過網頁同步檔案:
Step1
進到Google Drive管理頁面後,點左上角的磁碟圖示,選擇資料夾。
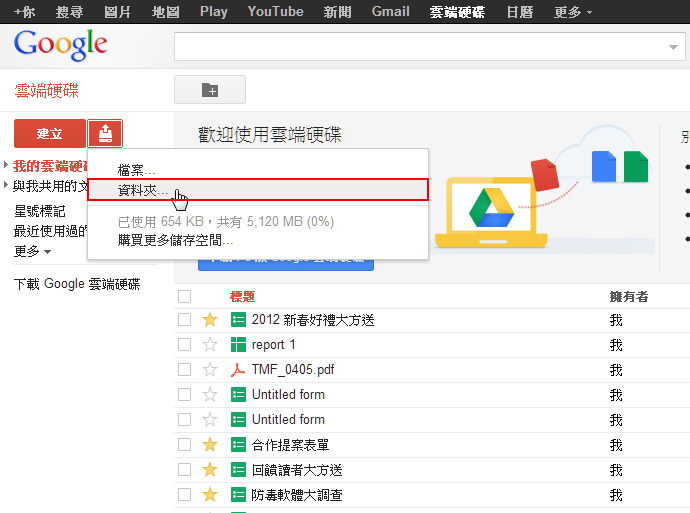
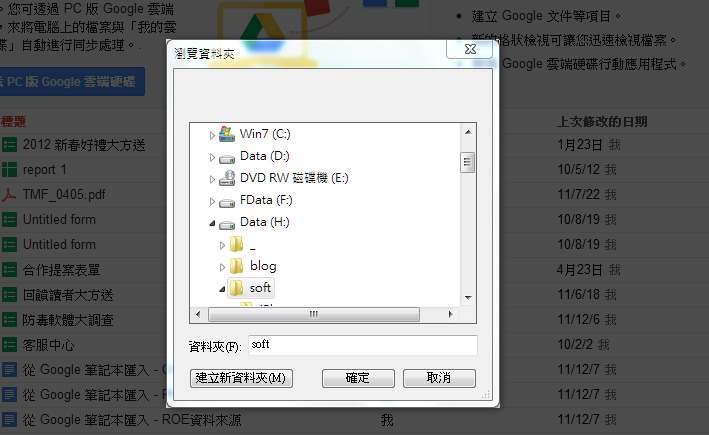
Step2
接著選擇本機端,要同步的目錄位置(Google Drive則是採用同步的概念,因此你的目錄結構長怎樣,同步到遠端去,就與本端一模一樣)。
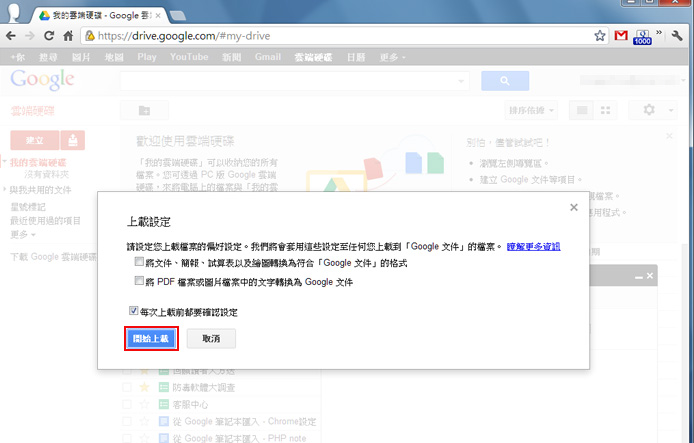
Step3
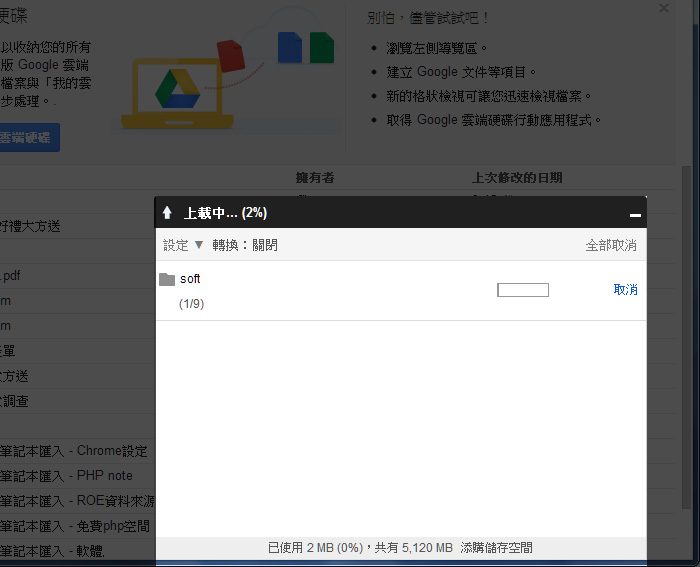
選好後,再按左下開始上載。
Step4
接著就會開始上傳了。
Step5
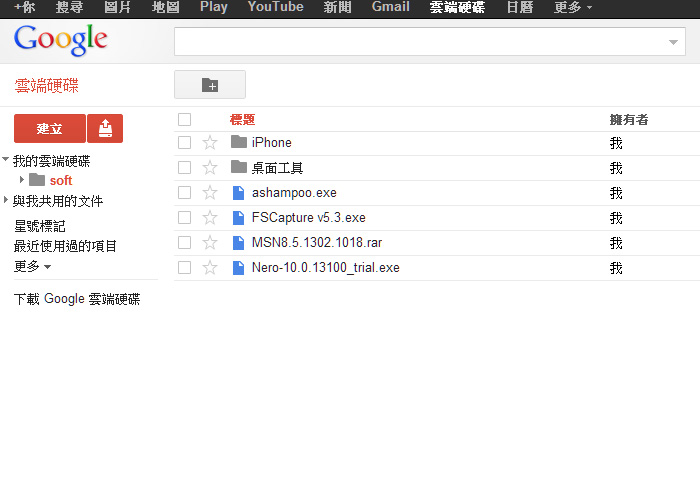
同步好後,馬上來看一下,這邊梅干故意使用中文資料夾名稱,可正常的顯示與運作。
透過電腦同步檔案:
Step1
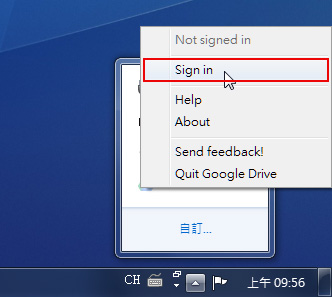
透過電腦來同步就更簡單了,先到官網下載程式,並完成安裝,接著在畫面的右下角,就會看到Google Drive圖示,點一下再選擇Sing in 。
Step2
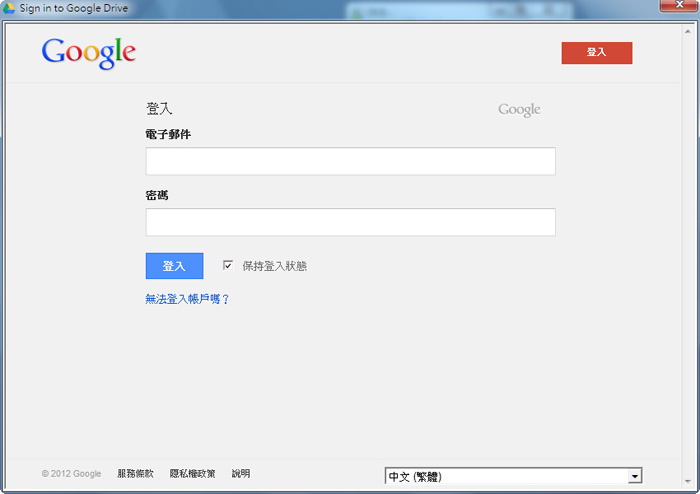
輸入Google的帳號與密碼。
Step3
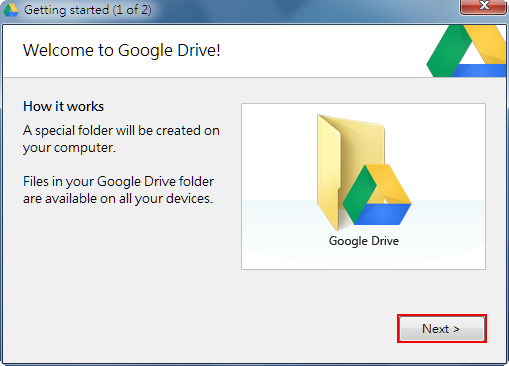
按Next鈕。
Step4
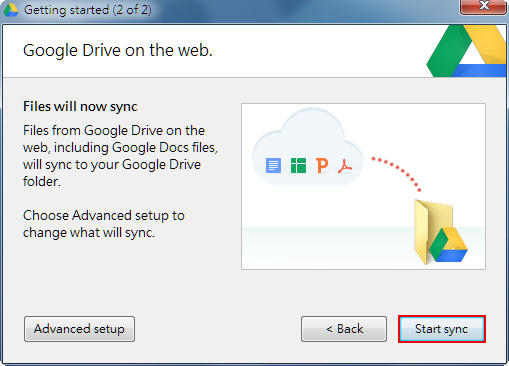
再按Start sync鈕。
Step5
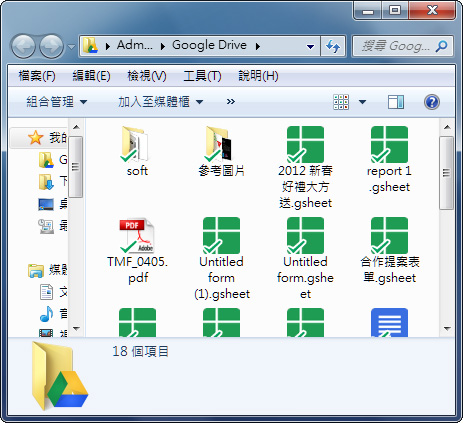
這時就會開始進行同步,當同步完成後,點開桌面的Google Drive資料夾,就會看到所有的資料,同時若要把資料上傳到Google Drive時,一樣只要放到該目錄下,程式就會自動進行同步。
檔案分享:
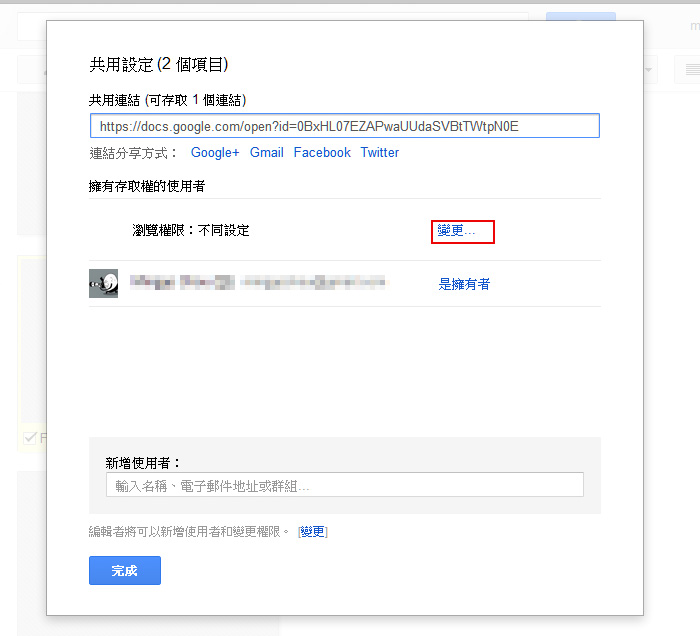
Step1
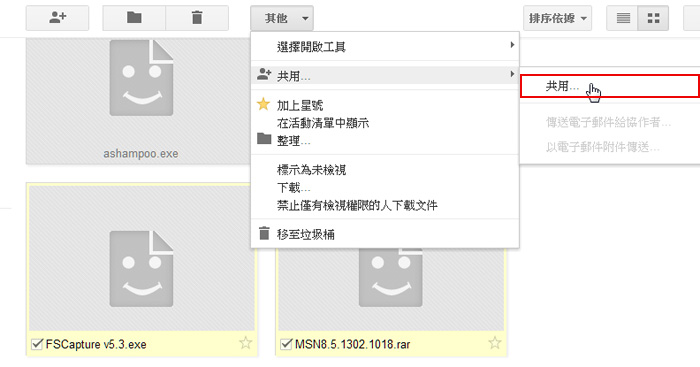
若要把檔案分享給其它人下載,將要分享的檔案勾選起來,選擇上方的其它 / 共用 / 共用。
Step2
點變更。
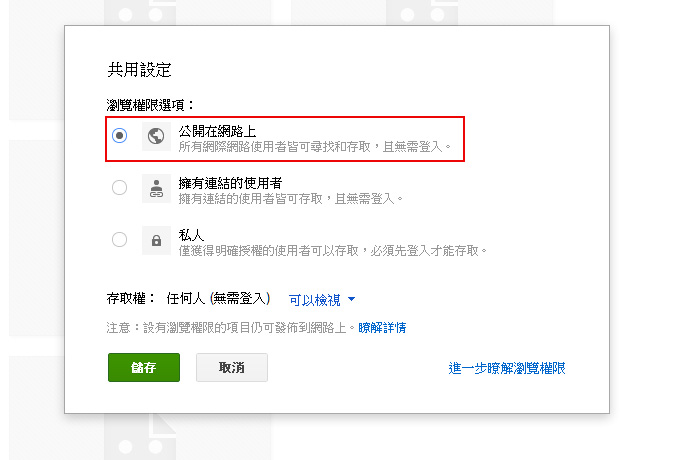
Step3
將權限設定成公開在網路上,設定好再按儲存鈕。
Step4
接著把網址貼給其它朋友,就可將檔案分享出來囉!

經梅干實用後,Google有別於一般網路磁碟,可自行建立管理資料夾料,而是採同步的概念,當本機目錄結構長怎樣,同步上去的資料結構就長怎樣,而唯一比較不錯的是,Google Drive支援中文名稱,雖然說免費版只有5GB,但應該也相當夠用,雖然說雲端很方便,梅干在這還是建議,一些較私密的檔案或圖片,還是放在自已的硬碟最安全,一些較不傷大雅的再丟雲端。