微軟表單
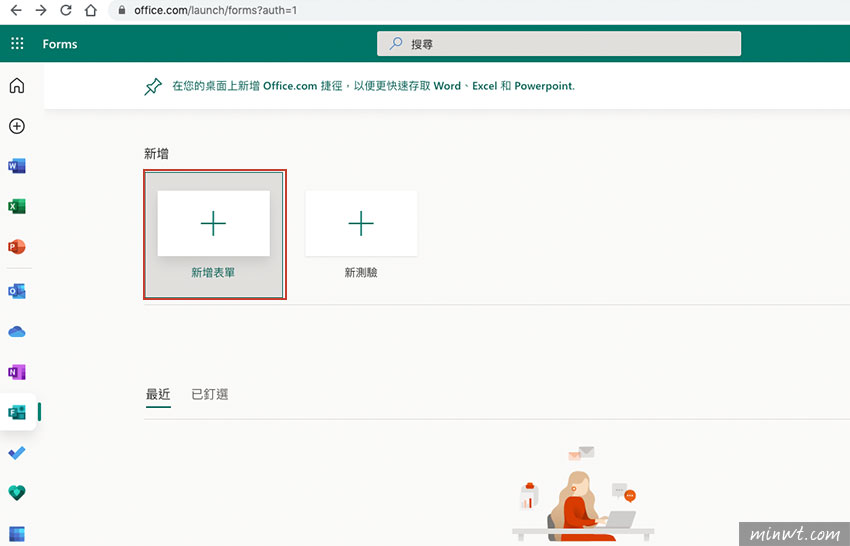
Step1
首先進到Microsoft Forms的表單後,按下登入鈕。

Step2
登入完畢後,再點「新增表單」。
Step3
接著先設定表單的名稱。
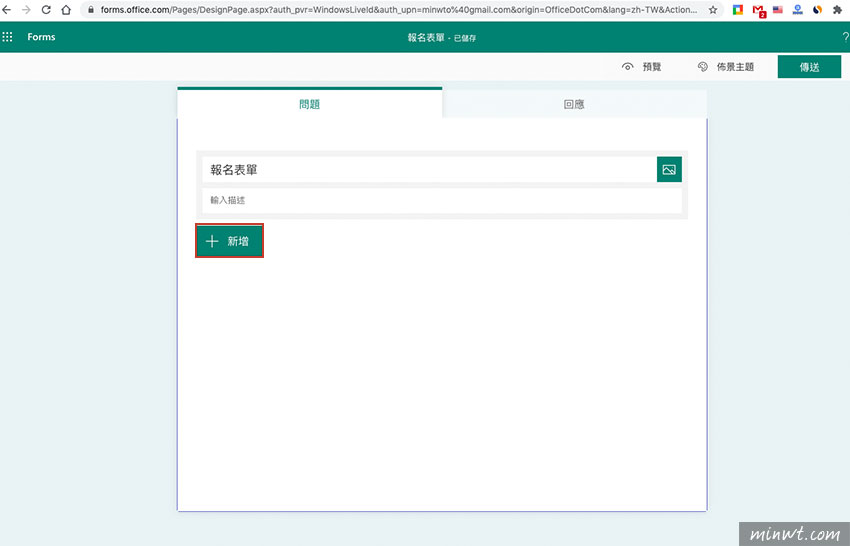
Step4
再按加號,就可新增欄位,而目前可設定的欄位,不像Goolge表單,那麼的豐富,但也算夠用了。
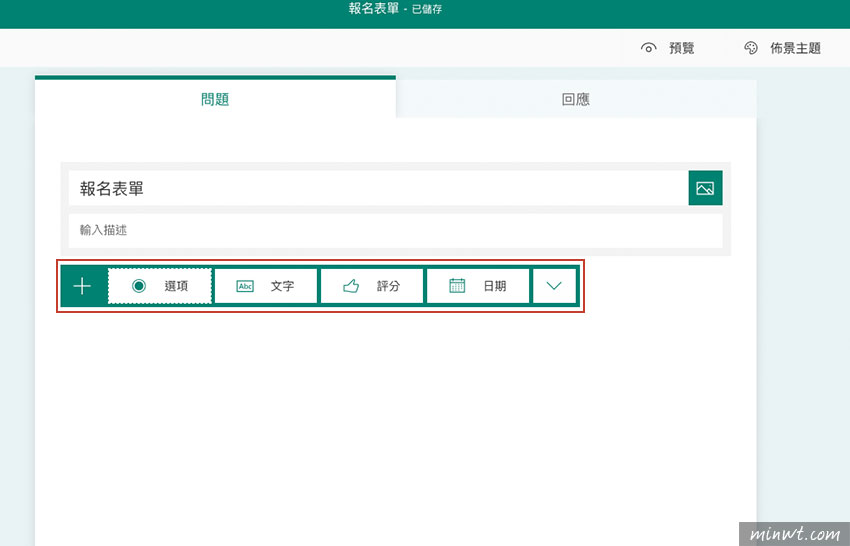
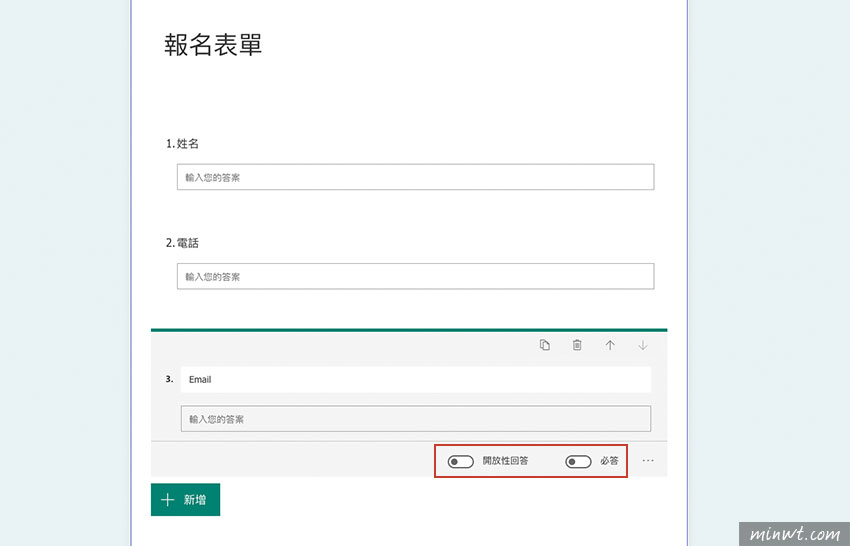
Step5
一般來說,最常用到就是單一輸入框,同時還可設定欄位是否為必填。
Step6
欄位都建立完畢後,再按右上的「傳送」。
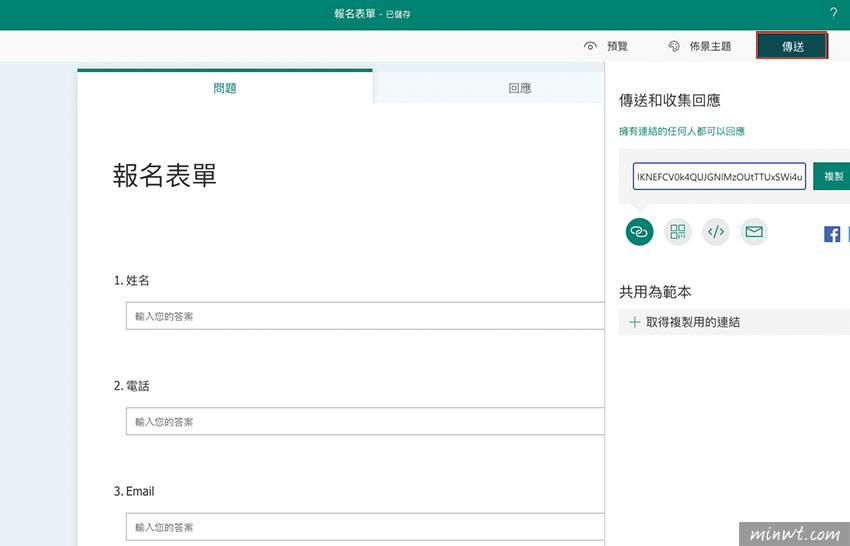
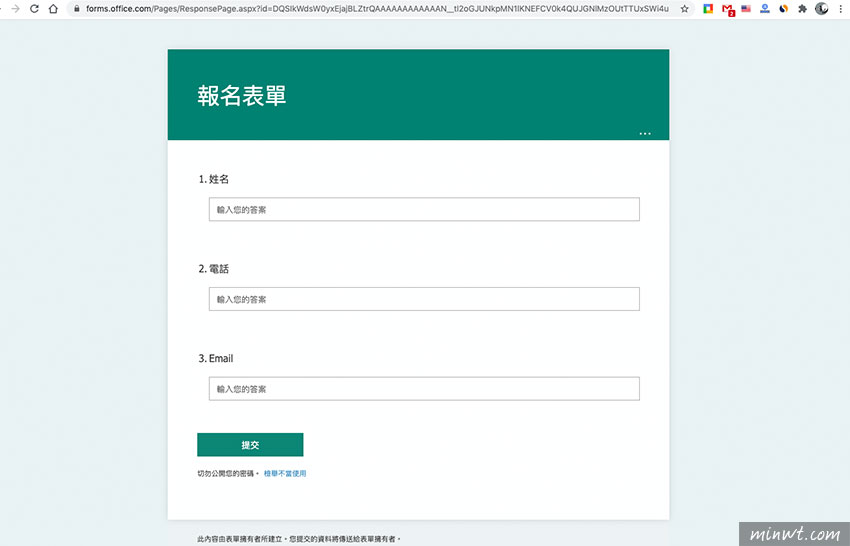
Step7
接著就會看到剛所建立好的表單內容,當然這表單也可用iframe的方式,嵌入到網頁中。
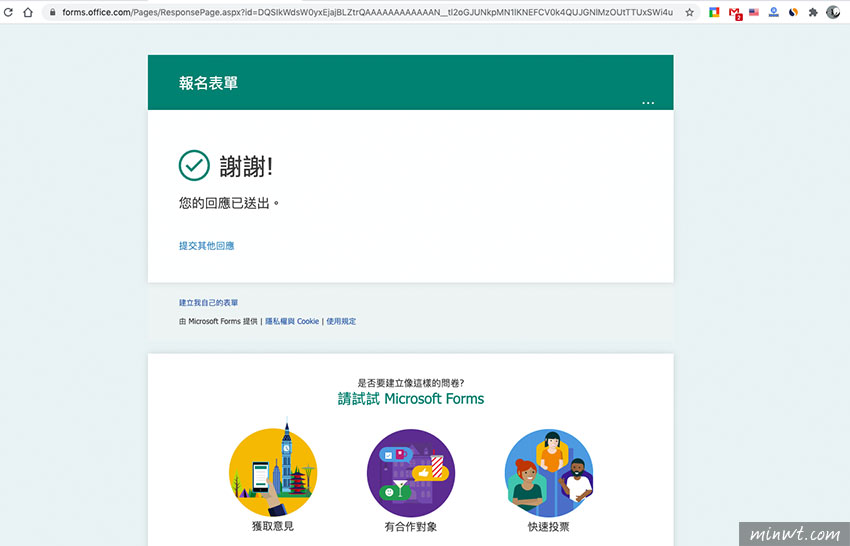
Step8
當表單填寫完畢時,也會出現感謝頁面。
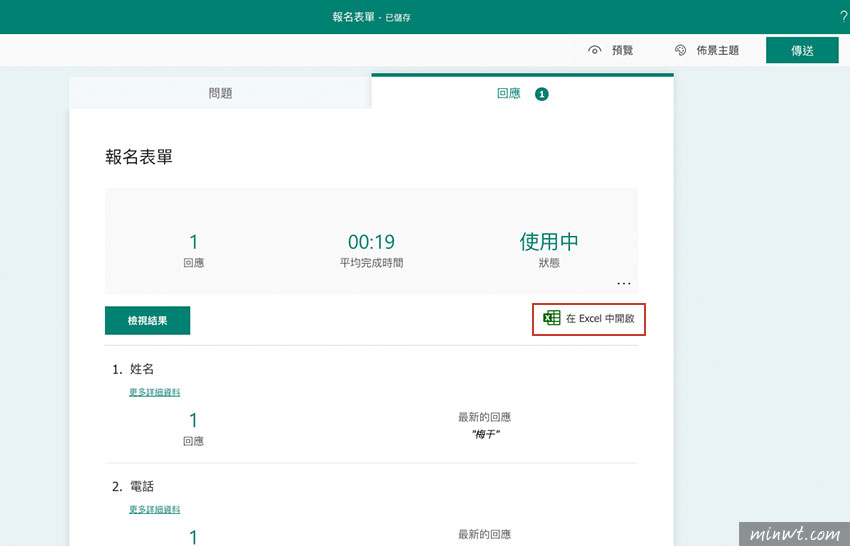
Step9
在Microfoft Forms的表單後台的回應頁籤中,也可看到所有的回應狀況,甚至也可將這些回應,打包成Excel預覽,雖然目前欄位類型不多,但就操控與畫面,都可當的簡潔好上手,因此有需製作表單的朋友,微軟表單,不妨也可試試看囉!