

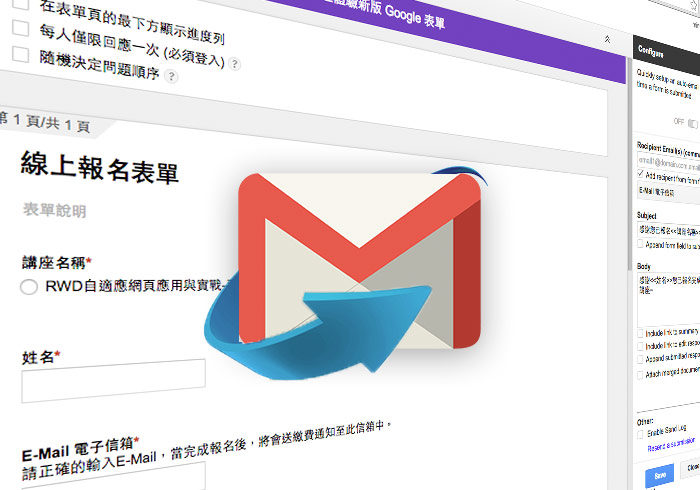
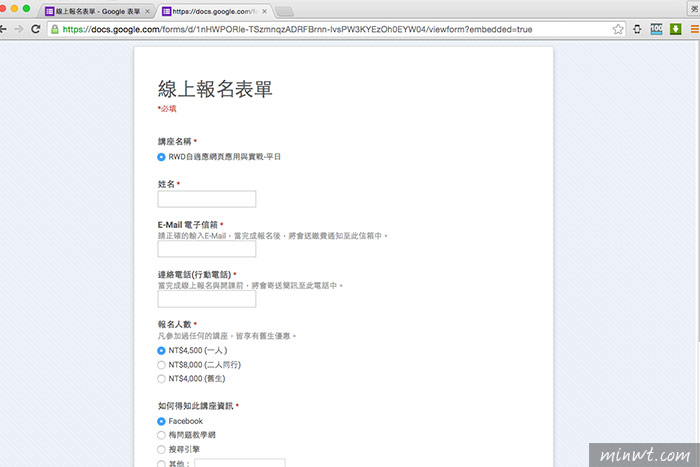
Google表單既方便又好用,無論是要拿來製作線上報名或團購都沒問題,因此像梅問題講堂中的報名表單,就是使用Google表單,除了方便統計報名人數以外,當有人報名時,還會立即收到通知, 但比較不便的是,使用者並不會知道是否已報名完成,所以這時就得自行手動發送確認信件告知,而最近梅干發現一隻Google 表單的外掛Simply Send就可作到,當使用者填完表單後,就會自動發送確認信到使用者的信箱中,因此有在用Google表單的朋友,現在也一塊來看看囉!
Step1
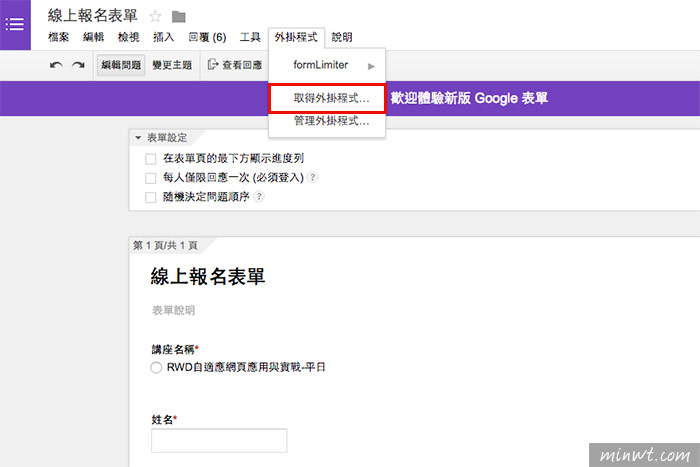
開啟已製好的Google表單,接著點選外掛程式/取得外掛程式選項。
Step2
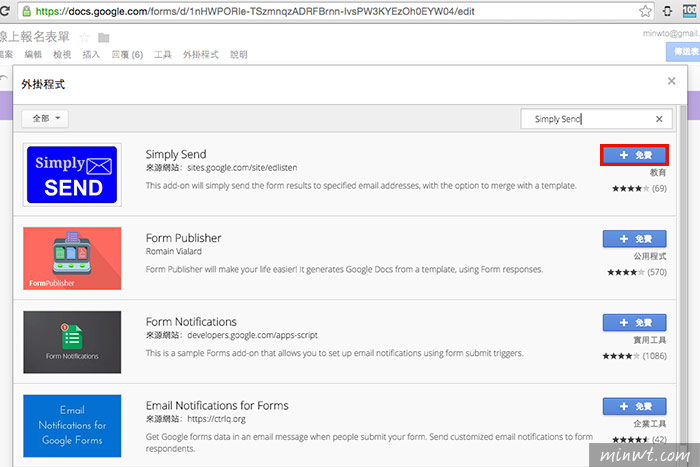
搜尋Simply Send關鍵字,找到後再按安裝。
Step3
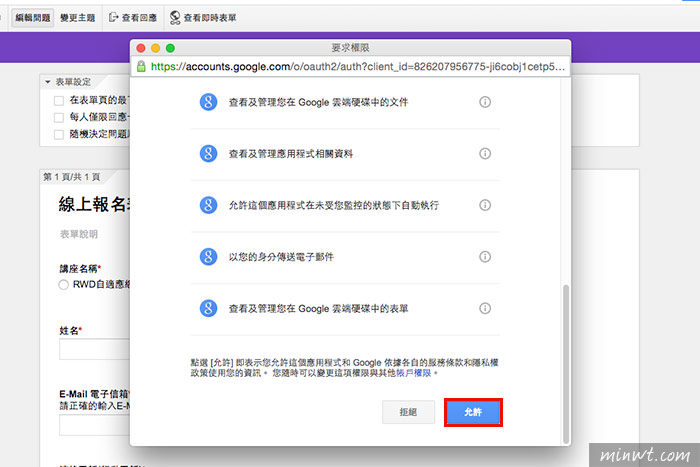
接著再按允許。
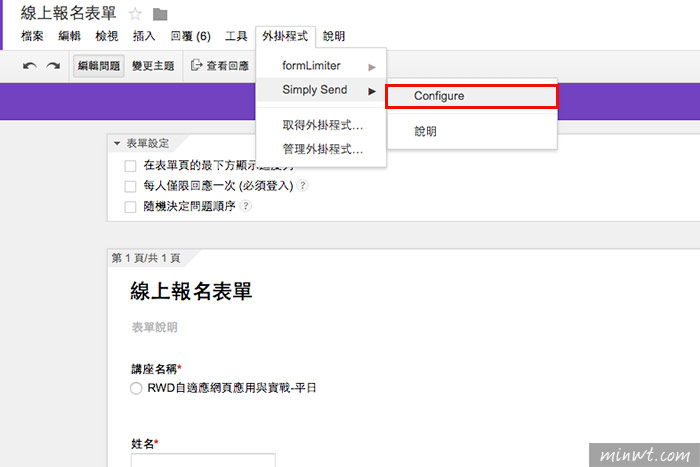
Step4
安裝完畢後,回到剛的Google表單,再點外掛程式,就會看到剛所安裝好的外掛名稱,再點Configure。
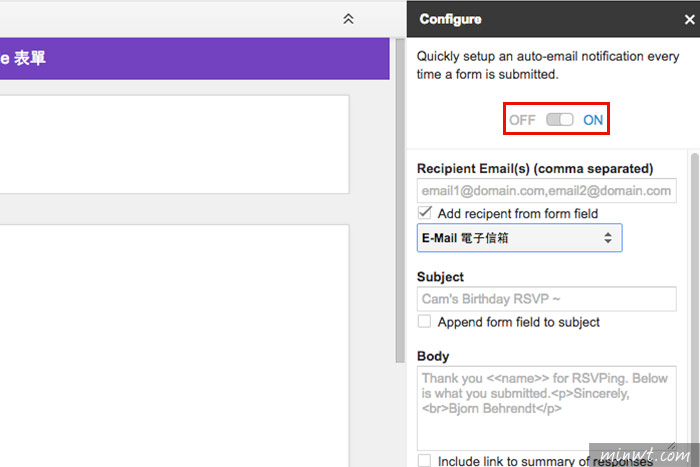
Step5
將上方的開關設為ON表示啟用。
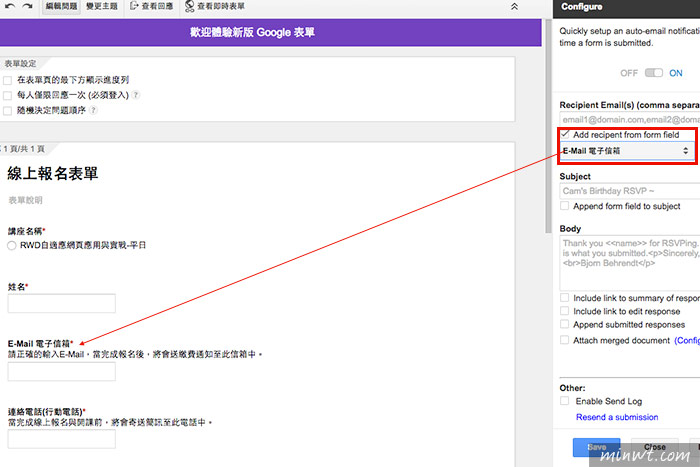
Step6
接著把Add recipent from form fidld勾選,並從下拉選單中,選擇表單中相對應的Email欄位名稱,這樣當很單填寫完畢後,就會自動回覆訊息到此信箱中。
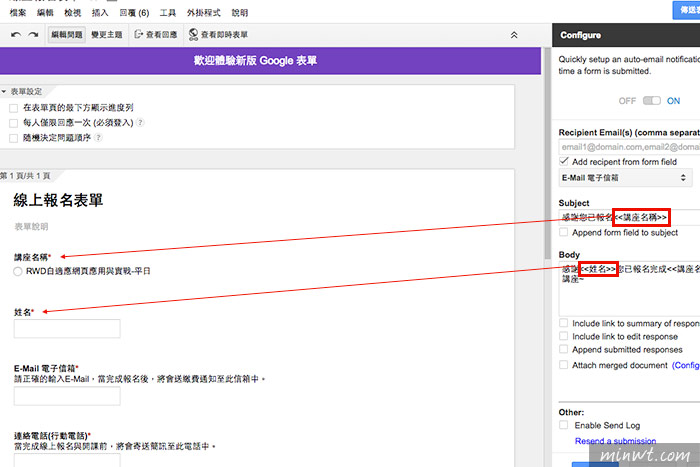
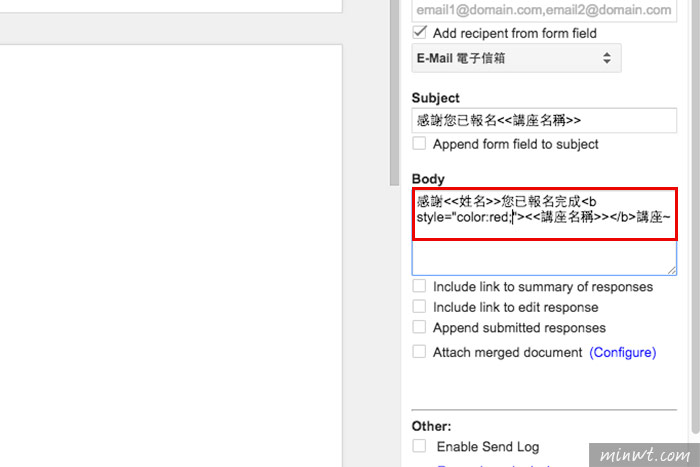
Step7
在信件中的主旨與內容,若要帶到表單中的欄位時,只需<<>>中間輸入欄位的名稱,就自動帶入到信件中。
Step8
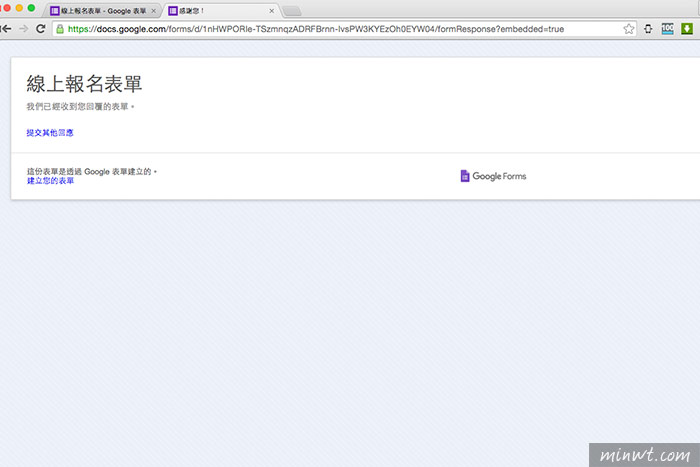
完成後,立馬來測試一下。
Step9
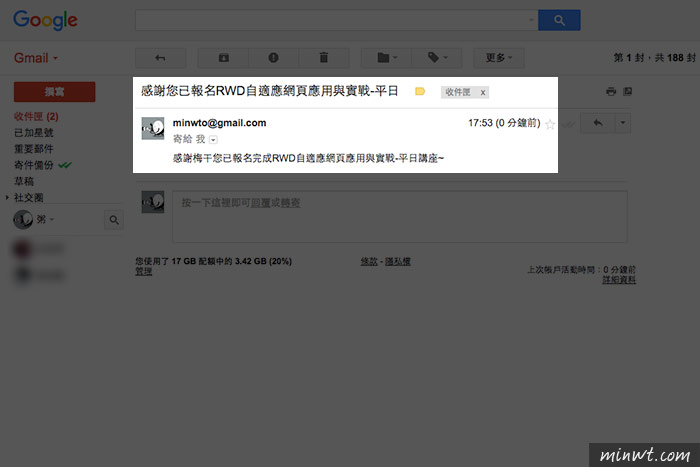
當填完表單後,接著到剛所輸入的信箱中收信。
Step10
這樣就會收到確認信啦!
Step11
而這個信件內容,是支援HTML與CSS的,因此在信件內容中,可自行的增加HTML標籤與CSS樣式。
Step12
再測試一次,這樣當收到的信件內容,就會依照剛所設定的CSS樣式,而有所變化,是不是很方便呀!有用Google表單的朋友,也趕快來試試囉!
