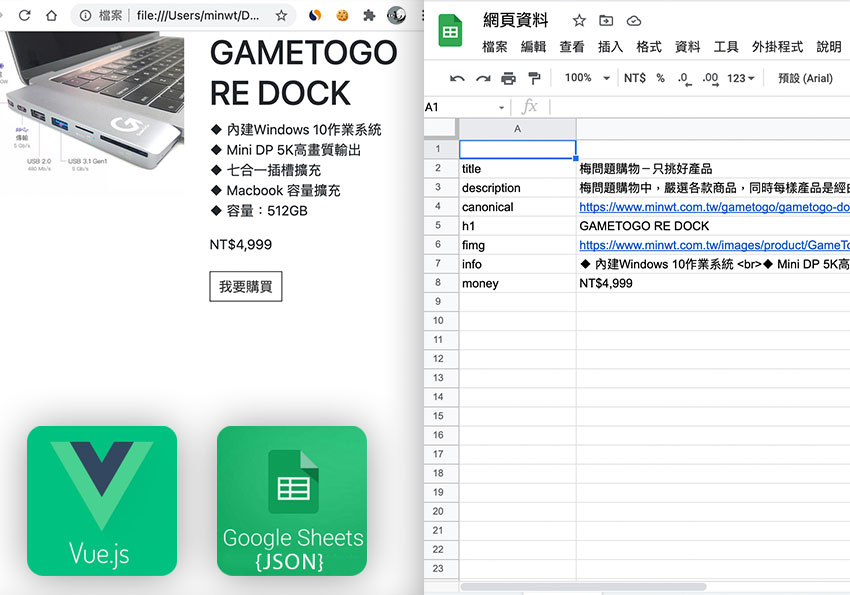
由於Google試算表所提供的是json格式,因此無論是使用前後端都可進行資料的解析,而接下來梅干就來示範一下,如何透過前端的方式,讀取Google試算表中的json格式解析後,再套入到區塊中,本來梅干打算用jQuery的,但想說最近剛學了VUE,正好用VUE來試試看,因此接下來就用VUE的方式,來讀取Google試算表中的json格式,並套到網頁中。
Step1
由於VUE本身無法直接讀取json,因此得透過axios這套件,所以分別先將vue與axios的js給引用到網頁中。 放到</body>前:
<script src="https://unpkg.com/vue@2.5.13/dist/vue.min.js"></script>
<script src="https://unpkg.com/axios/dist/axios.min.js"></script>
<script src="https://unpkg.com/axios/dist/axios.min.js"></script>
Step1
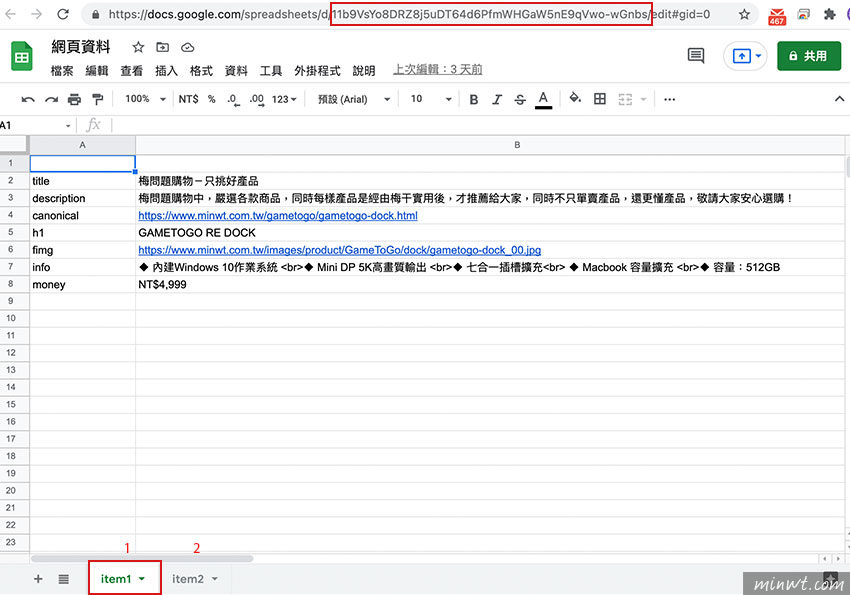
Google試算表的json網址。
https://spreadsheets.google.com/feeds/list/KEY/SHEET INDEX/public/values?alt=json
Step2
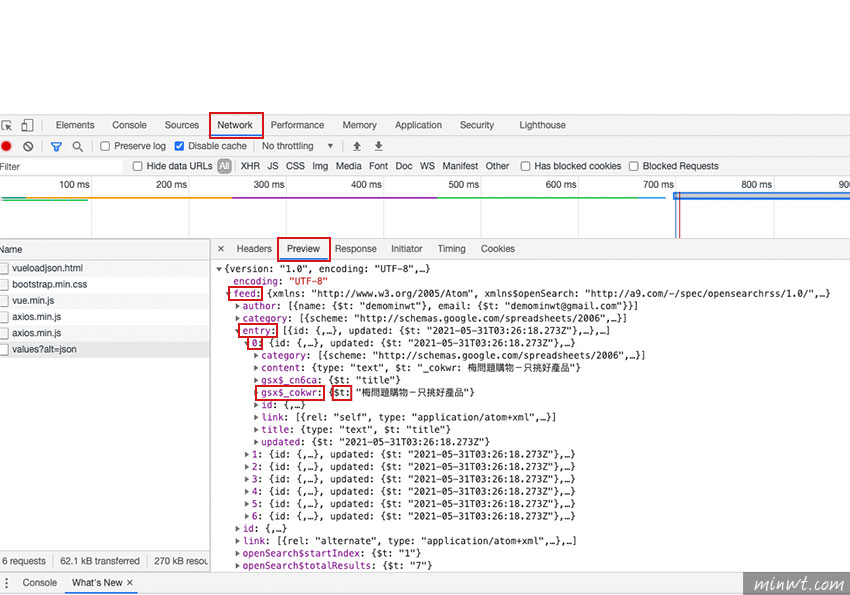
接著再get的地方,放入Google試算表中的json網址,完成後開啟瀏覽器預覽,並在網頁開發人員工具中,的Network頁籤下的Preview, 就可詳盡看到json樹狀圖。
new Vue({
el: '#app',
data () {
return {
info: null,
h1: null,
img: null,
money: null,
link: null
}
},
mounted () {
axios .get('https://spreadsheets.google.com/feeds/list/11b9VsYo8DRZ8j5uDT64d6PfmWHGaW5nE9qVwo-wGnbs/1/public/values?alt=json');
}
});
el: '#app',
data () {
return {
info: null,
h1: null,
img: null,
money: null,
link: null
}
},
mounted () {
axios .get('https://spreadsheets.google.com/feeds/list/11b9VsYo8DRZ8j5uDT64d6PfmWHGaW5nE9qVwo-wGnbs/1/public/values?alt=json');
}
});
Step3
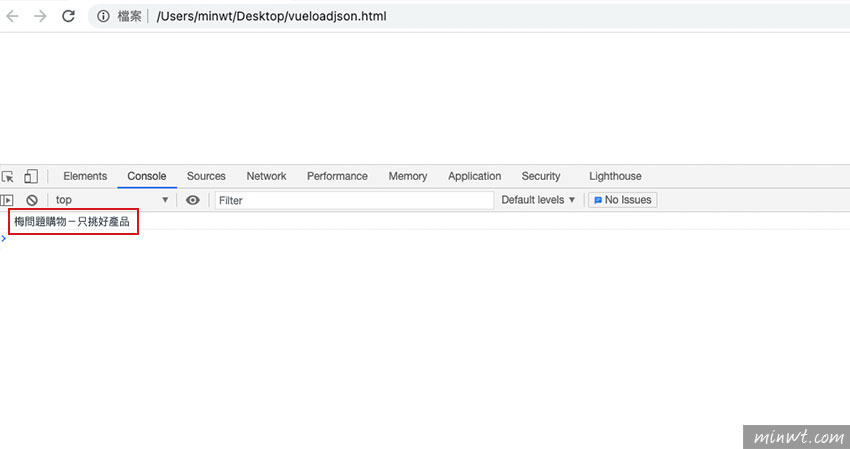
接著再加入.then並將剛剛的json格式,依照層級,正確的選取後,就可抓取到第0筆的資料啦!
mounted () {
axios
.get('https://spreadsheets.google.com/feeds/list/11b9VsYo8DRZ8j5uDT64d6PfmWHGaW5nE9qVwo-wGnbs/1/public/values?alt=json')
.then(response =>{
console.log(JSON.parse(JSON.stringify(response.data))['feed']['entry'][0]['gsx$_cokwr']['$t']);
});
}
axios
.get('https://spreadsheets.google.com/feeds/list/11b9VsYo8DRZ8j5uDT64d6PfmWHGaW5nE9qVwo-wGnbs/1/public/values?alt=json')
.then(response =>{
console.log(JSON.parse(JSON.stringify(response.data))['feed']['entry'][0]['gsx$_cokwr']['$t']);
});
}
Step4
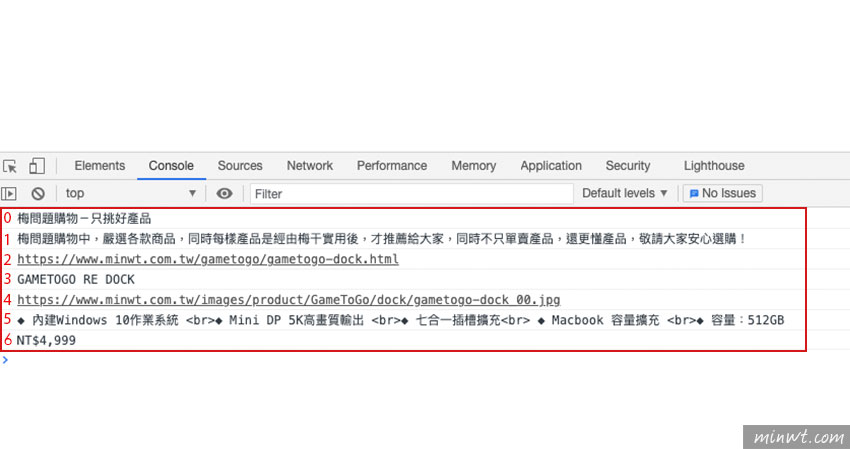
就這樣依續的將Google試算表中的資料一一抓取出來。
.then(response =>{
console.log(JSON.parse(JSON.stringify(response.data))['feed']['entry'][0]['gsx$_cokwr']['$t']);
console.log(JSON.parse(JSON.stringify(response.data))['feed']['entry'][1]['gsx$_cokwr']['$t']);
console.log(JSON.parse(JSON.stringify(response.data))['feed']['entry'][2]['gsx$_cokwr']['$t']);
console.log(JSON.parse(JSON.stringify(response.data))['feed']['entry'][3]['gsx$_cokwr']['$t']);
console.log(JSON.parse(JSON.stringify(response.data))['feed']['entry'][4]['gsx$_cokwr']['$t']);
console.log(JSON.parse(JSON.stringify(response.data))['feed']['entry'][5]['gsx$_cokwr']['$t']);
console.log(JSON.parse(JSON.stringify(response.data))['feed']['entry'][6]['gsx$_cokwr']['$t']);
}
Step5
抓取後,再將它一一的塞回到網頁的區塊中,這樣就大功成啦!因此不熟悉PHP的朋友,不妨也可試試用前端的語言VUE來抓取囉!
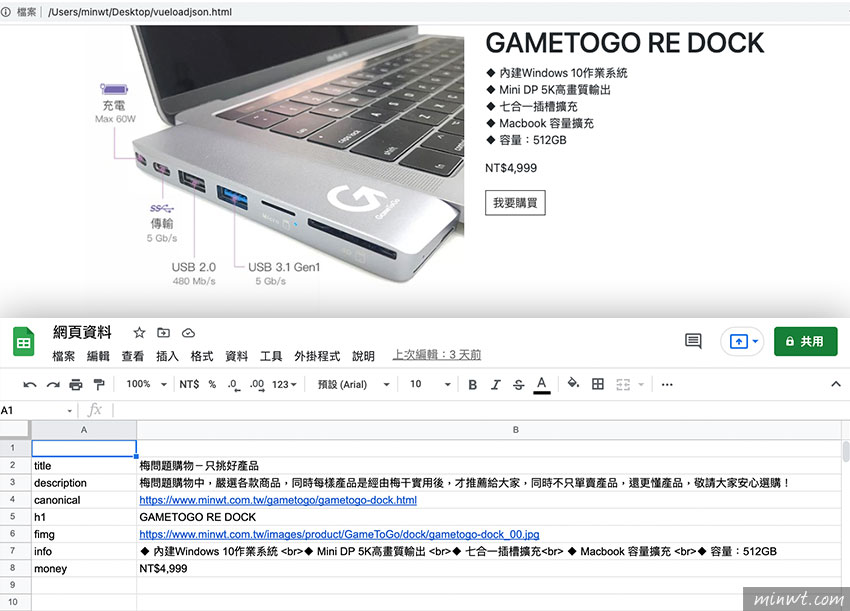
#範例預覽:

