其實Dreamweaver CC 2020 終於將 git 版控的功能,內建到Dreamweaver中,且在同步檔案的過程中,也完全需輸入指令,與Visual Studio Code有些相似,也是透過視覺化的操作,就能輕鬆的將本機的檔案同步到遠端的儲存空間啦!但要怎麼來使用,有需要的朋友,現在也一塊來看看囉!
Step1
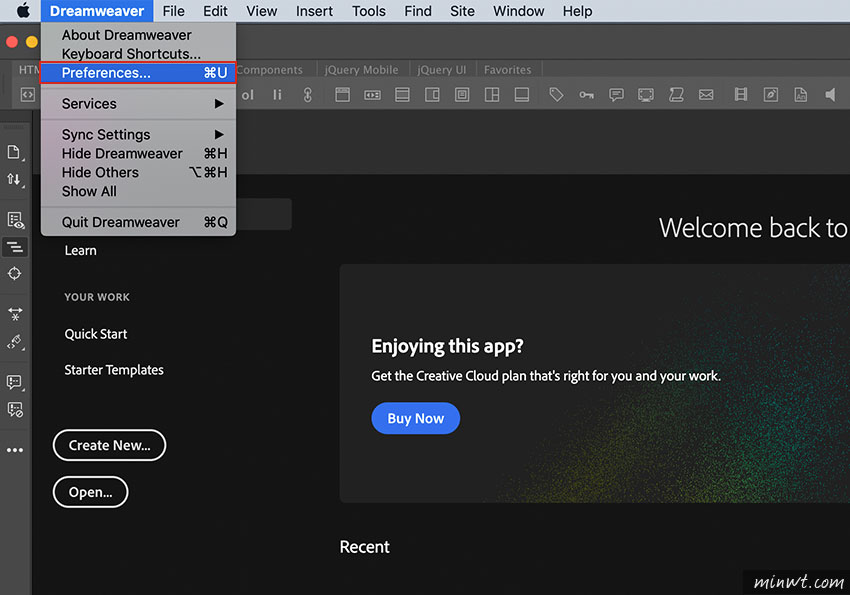
首先,開啟 Dreamweaver 後,進入「Preferences」選項。
Step2
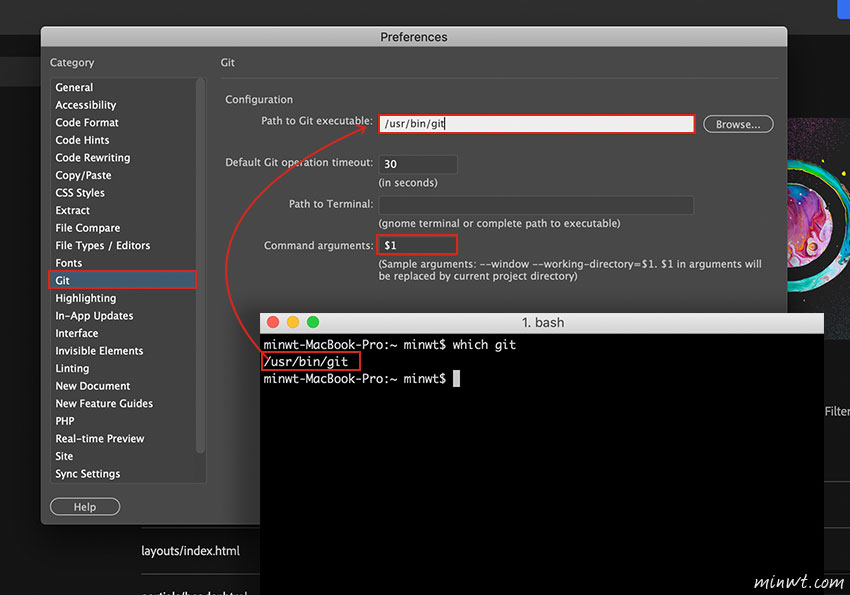
進入偏號設定面板後,切到 Git 選項,並開啟終端機,輸入「which git」看一下git的安裝目錄,並將路徑貼到Dreamweaver的欄位中,以及將最後一個欄位設為「$1」。
Step3
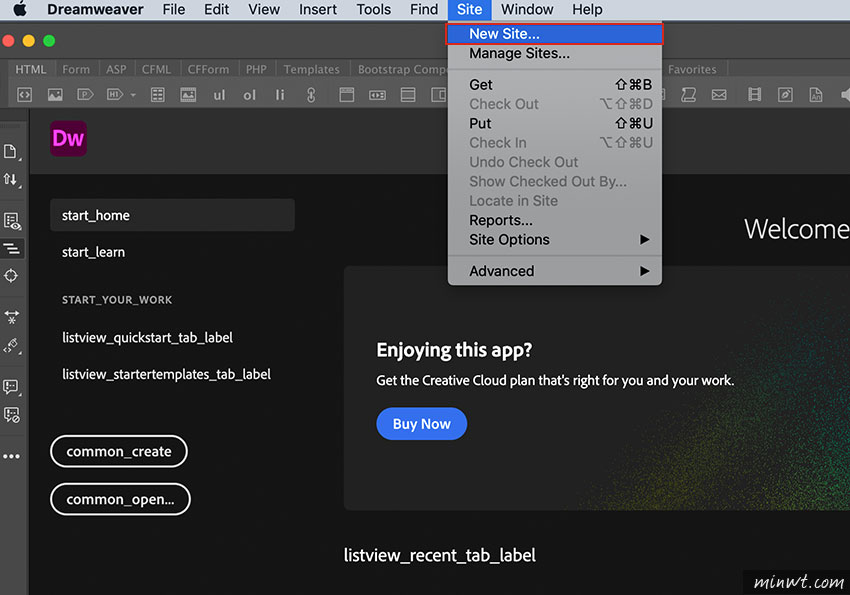
設定完後,重啟Dreamweaver後,再選擇「Site / New Site」選項。
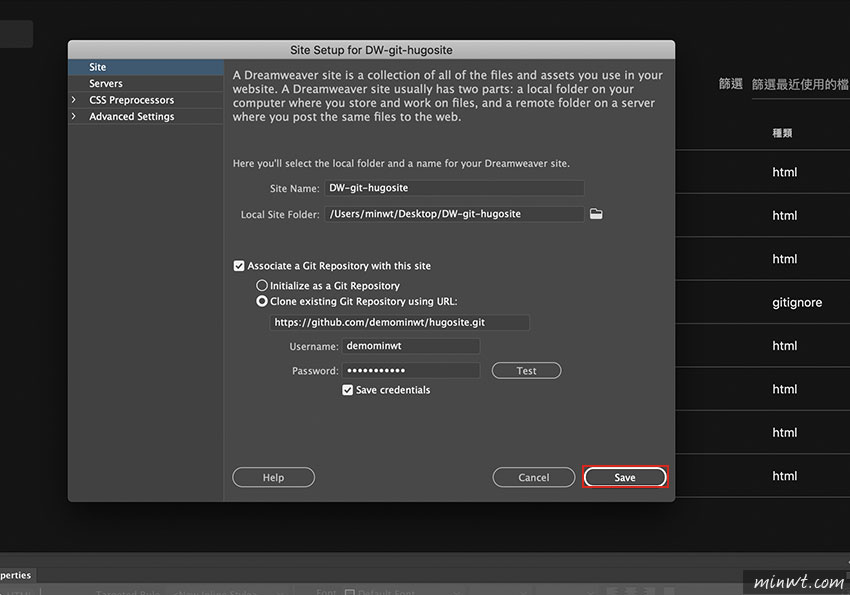
Step4
接著設定站台名稱,以及網站的資料夾位置。

Step5
再到 gitHub 將先前已建立的專案位置 複製起來,貼到Dreamweaver 下方的欄位中,以及 gitHub 登入的帳號。
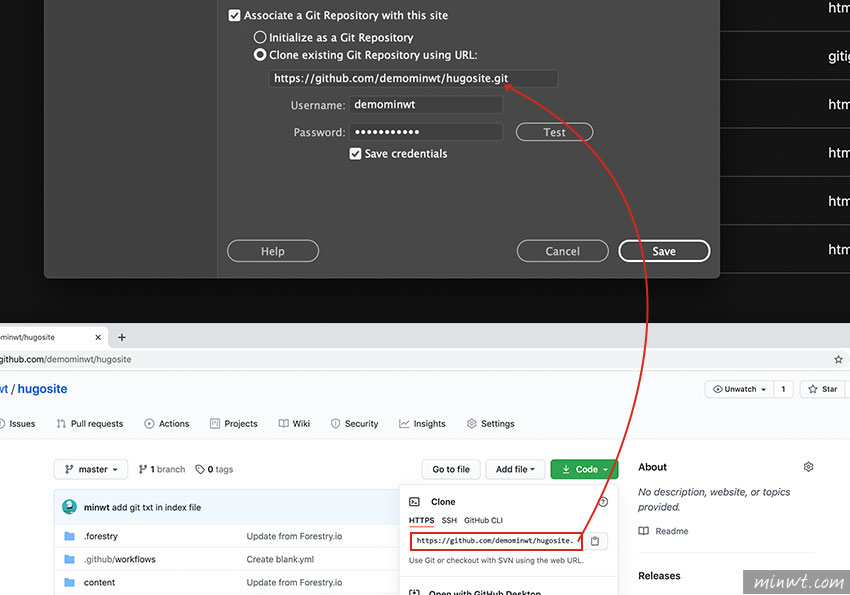
Step6
都設定好後,再按 Save 鈕。
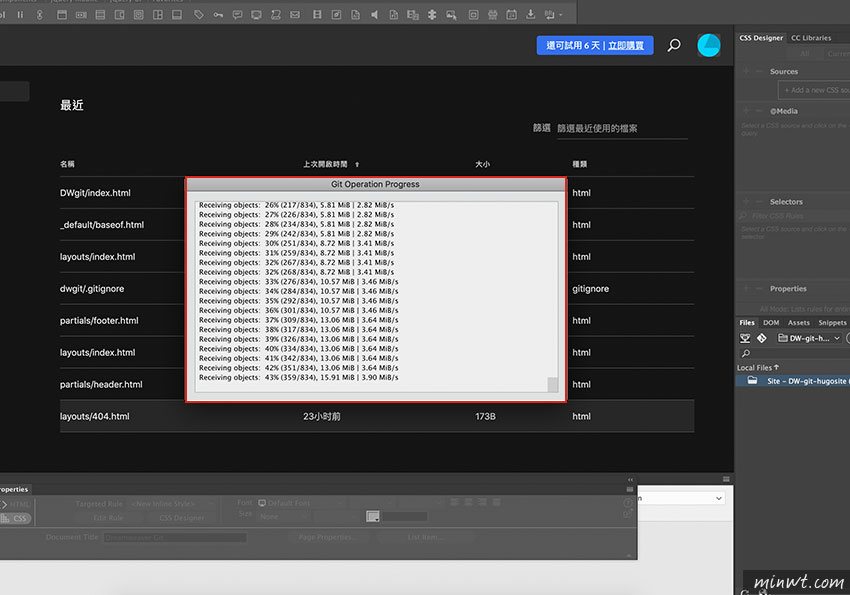
Step7
這時就會將遠端的資料,複製一份回本機端中。
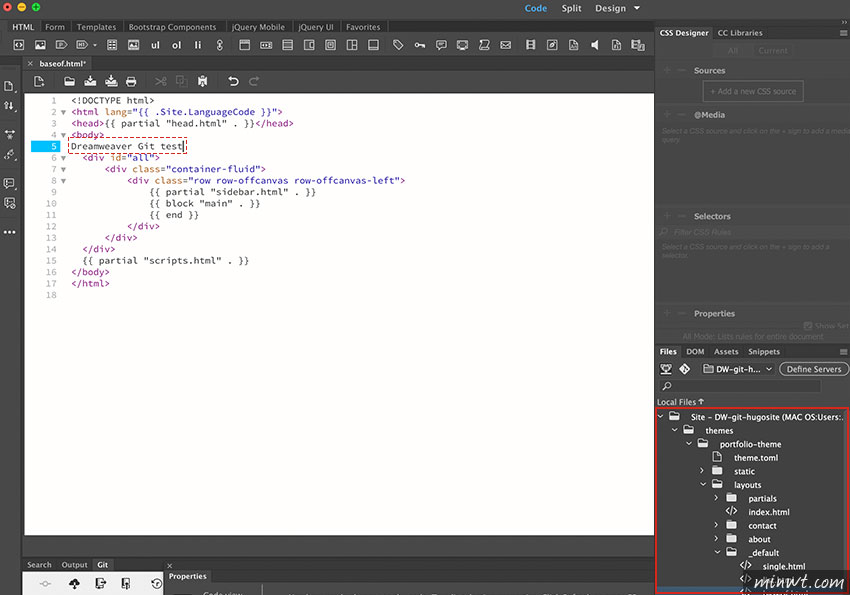
Step8
當複製完畢後,在右邊的站台資訊中,就會看到與gitHub一模一樣的架構,接著就可開啟檔案進行編修。
Step9
當修改完畢後,並將它儲存起來,這時在下方的Git面板,就會列出已修改過的檔案清單,再將要同步的檔案勾起來,再點左上的註記圖示,並輸入備忘錄,而這邊比較美中不足的是,無法輸入中文。
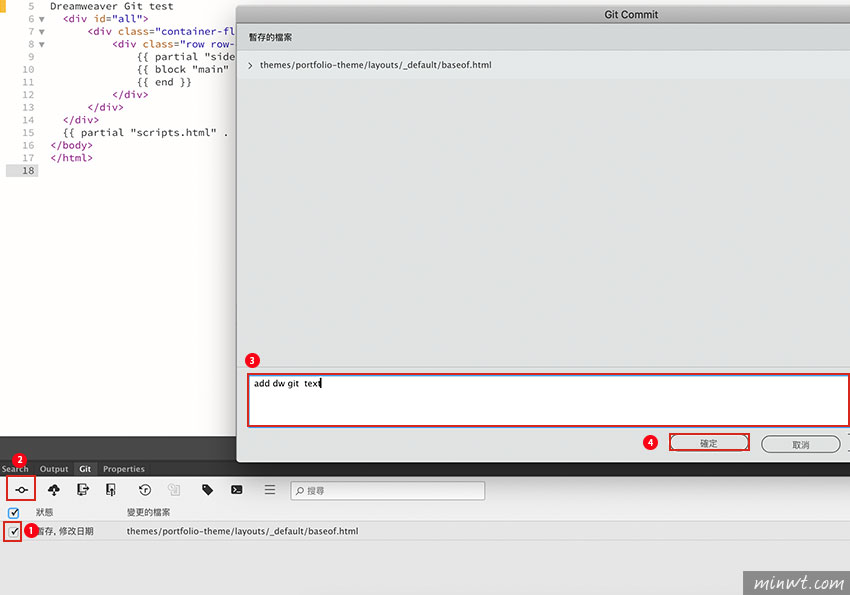
Step10
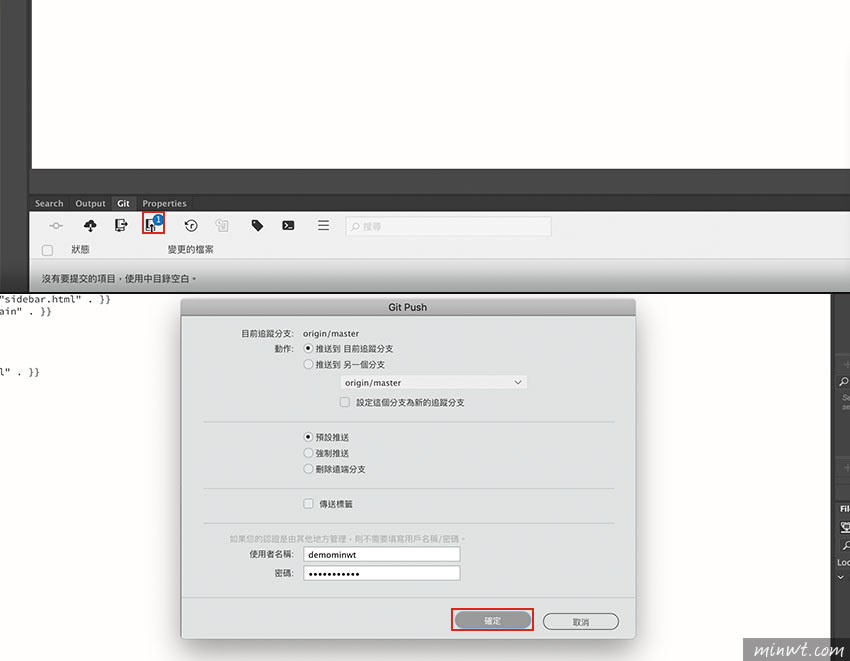
接著再按 推送 鈕,再按 確定。
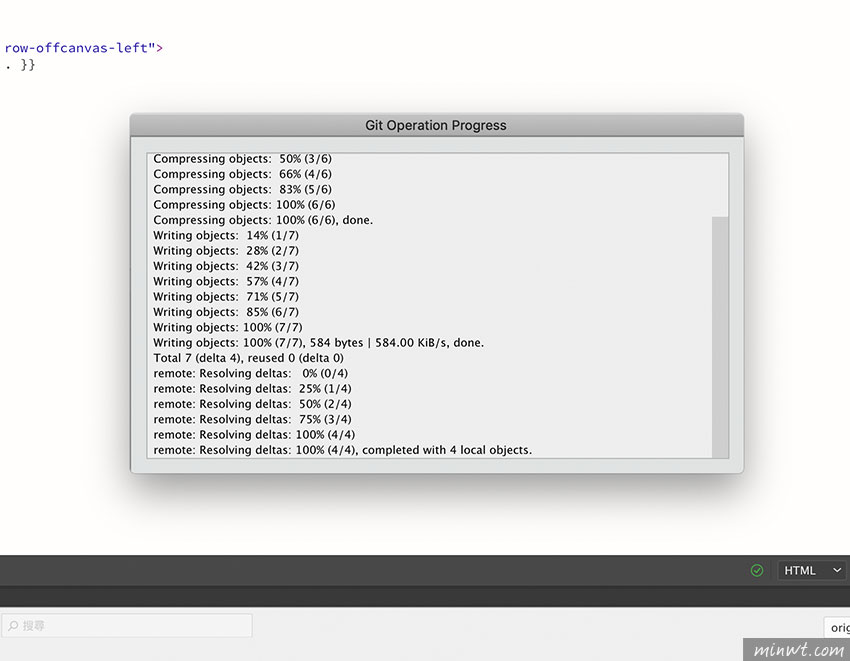
Step11
當在傳送的過程中,也可看到目前的傳送訊息。
Step12
當傳送完畢後,也會出現已完成的資訊。
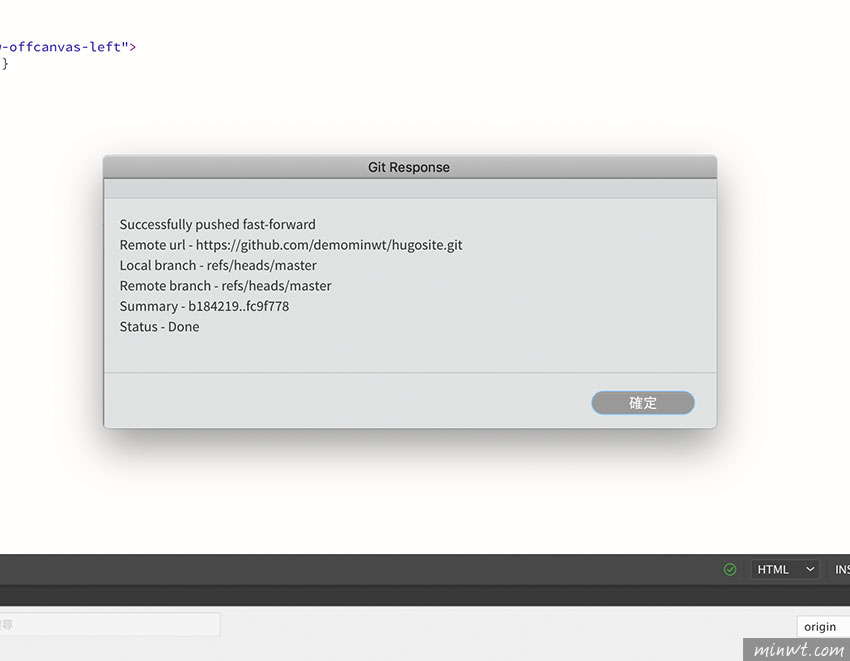
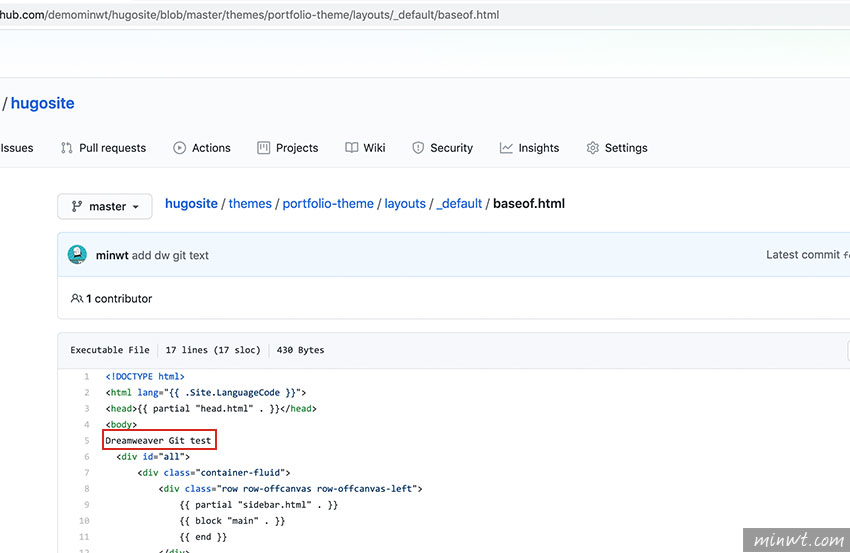
Step13
最後再到gitHub來檢查一下,哈~檔案也成功的被傳送上來,當習慣使用版控同步檔案後,就回不去用FTP啦!!因此想要在Dreamweaver cc中使用git的朋友,不妨也可試試看囉!!