

若要在一般的網頁製作重覆的背景底圖,是一件相當容易的事, 但在Flash中卻是一件遙不可及的事, 這看似平常的功能,在Flash則要寫一些Code碼,才可完成這項不可能的任務,好在Code並不多,只要短短的幾行就可讓Flash下,實現重覆背景底圖的夢想,重覆背景底圖相當方便好用,只要作一張小圖,就可佈滿整個畫面,就不用每次作一大張底圖,也不用擔心一旦改變文件大小底圖露陷的問題,而最近正好也有網友問到,那梅干就來說明一下作法吧!
準備素材:
使用平台:Flash CS3、CS4
使用語言:Actionscript3.0
底圖素材:

使用語言:Actionscript3.0
底圖素材:

Step1
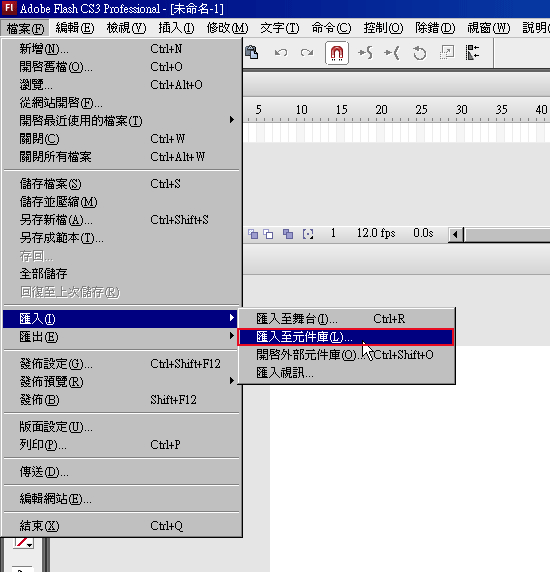
開啟Flash CS3,新增一個新檔案,再執行功能表 檔案 / 匯入 / 匯入至元件庫。
Step2
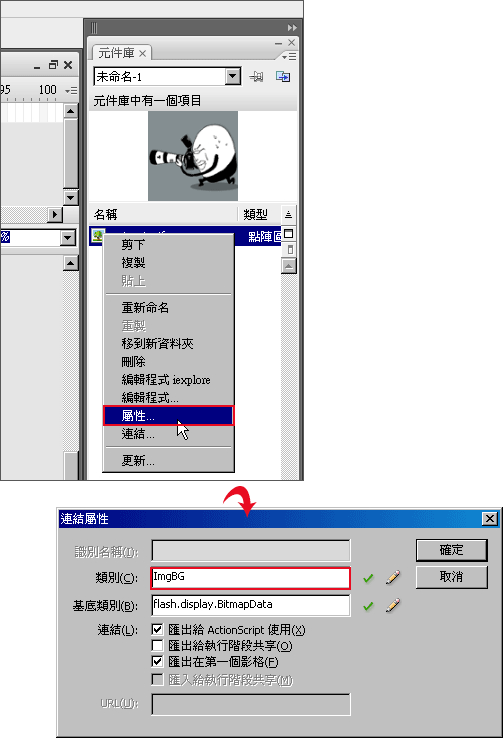
開啟元件庫對著剛匯入的圖檔,按滑鼠右鍵,選擇【屬性】並將【匯出給Actionscript使用】勾選起來,在類別的欄位中輸入ImgBG。
Step3
回到場景,對著時間軸上的影格1,按F9並輸入下方的語法,至於new ImgBG要與步驟2輸入的相同才行,而在ImgBG()中二個數值是啥意思,梅干就沒多加研究,若有網友知道也歡迎分享。

import flash.display.Bitmap;
import flash.display.BitmapData;
function fillbg():void {
var bitmapdata:BitmapData = new ImgBG(56,56);
this.graphics.beginBitmapFill(bitmapdata);
this.graphics.drawRect(0,0,stage.stageWidth,stage.stageHeight);
this.graphics.endFill();
}
stage.addEventListener(Event.RESIZE,resizeHanlder);
function resizeHanlder(event:Event):void {
fillbg();
}
fillbg();
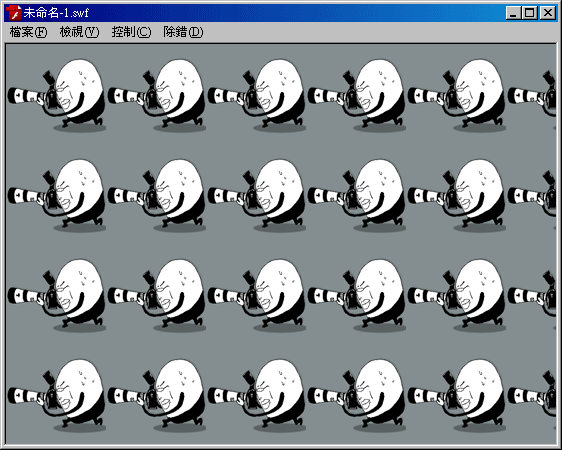
範例預覽:
[範例下載]