上星期已分享如何在Google Cloud Platform雲端主機上架設WordPress,與綁定網域名稱,應該並不難,但要如何開啟Google雲端主機的FTP呢?這部分在設定會有點複雜,首先要在電腦先產生一個金鑰,再把這個金鑰放到雲端主機中,接著再把金鑰放到像FileZilla後,就可透過FileZilla連上雲端主機,有別於一般FTP只需位置與帳密就可連線。
但比較好的是,透過Windows來產生會過程會簡單許多,若是透過MAC的話,會需要輸入一些指令,以及要返覆的的查看建立的專案類型,才能產生金鑰,因此待會在產生金鑰的過程中,將使用Windows會比較快且方便,因此現在就一塊來看看,如何透過FileZilla連上Google的雲端主機吧!
Step1
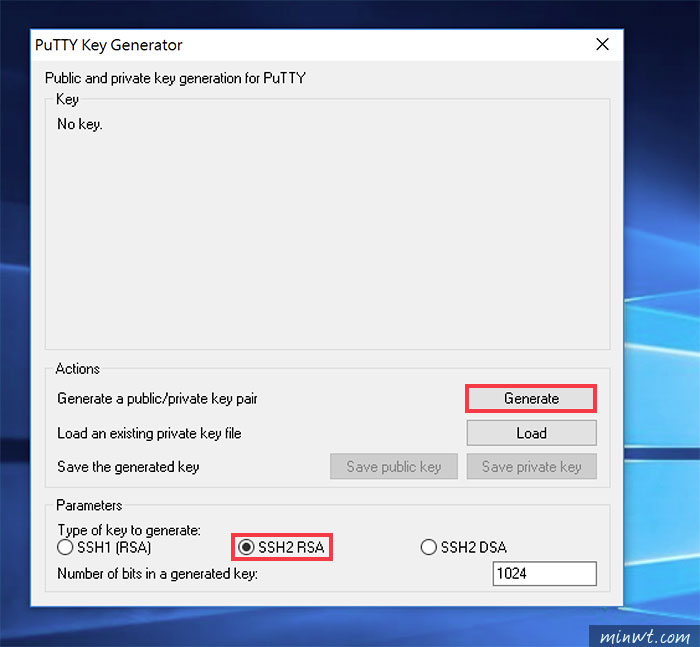
首先,下先下載「PuTTY Key Generator」,下載完畢雙響開啟後,先將下方的模式設為「SSH2 RSA」,接著按再「Generate」,這時就會開始產生金鑰。
Step2
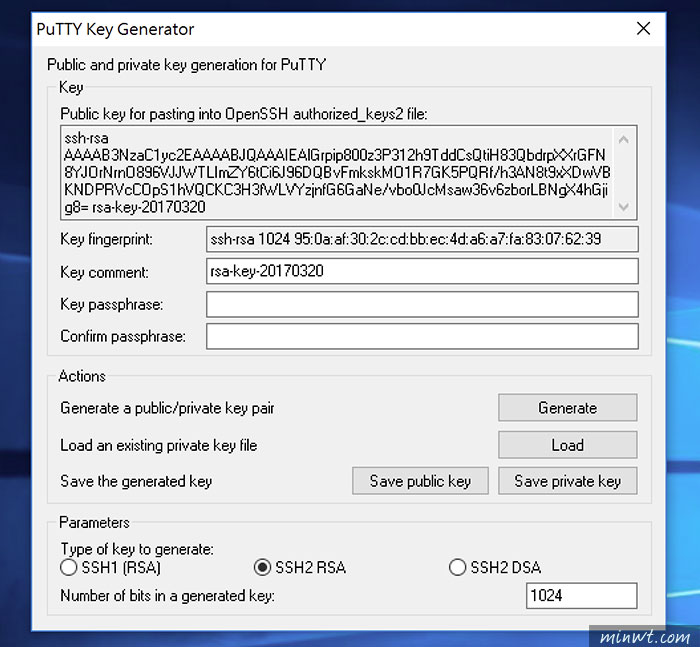
過一回上方就會出現一串像亂碼的字串,這就是金鑰。
Step3
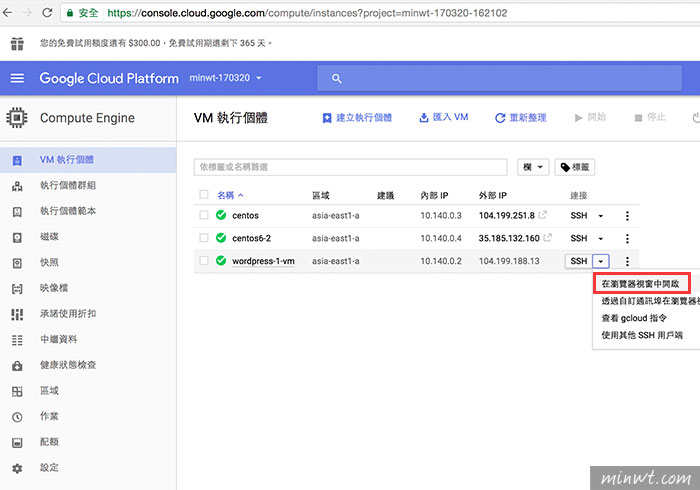
接著回到Google雲端主機,點wordpress專案後方的SSH,並選擇「在瀏覽器視窗中開啟」。
Step4
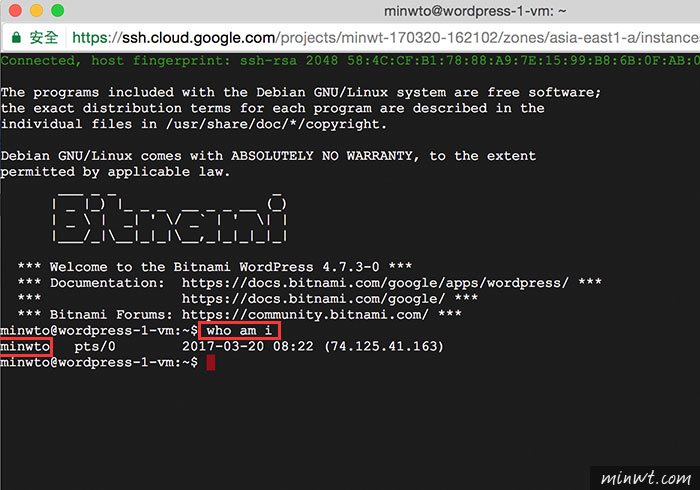
開啟後,再輸入who am i,再按下Enter後,這時就會看到管理者名稱。
Step5
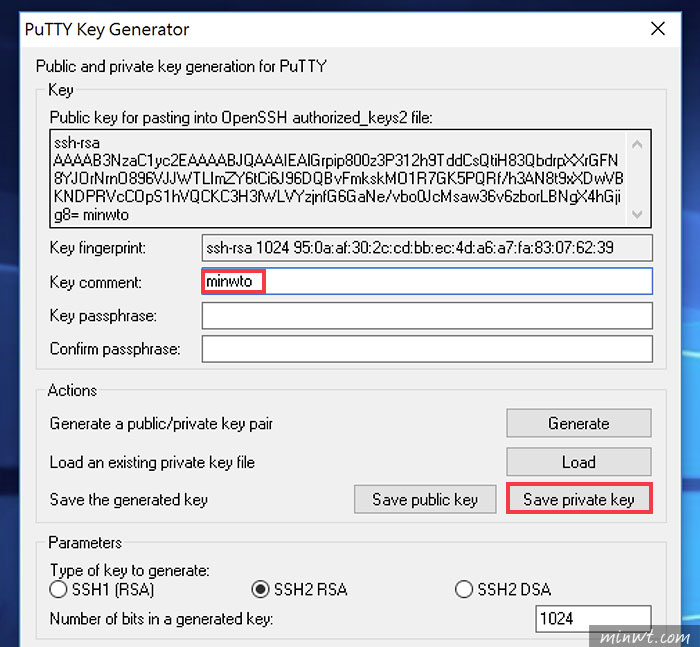
再把剛的名稱複製起來,貼到剛所產生金鑰面板的「Key comment」中,接著點下方的「Save private key」鈕,將它儲存起來。
Step6
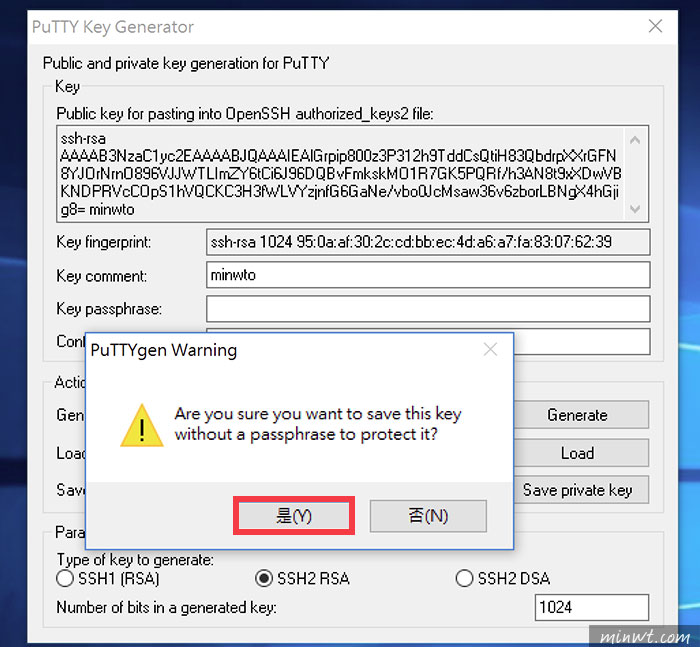
接著按「是」。
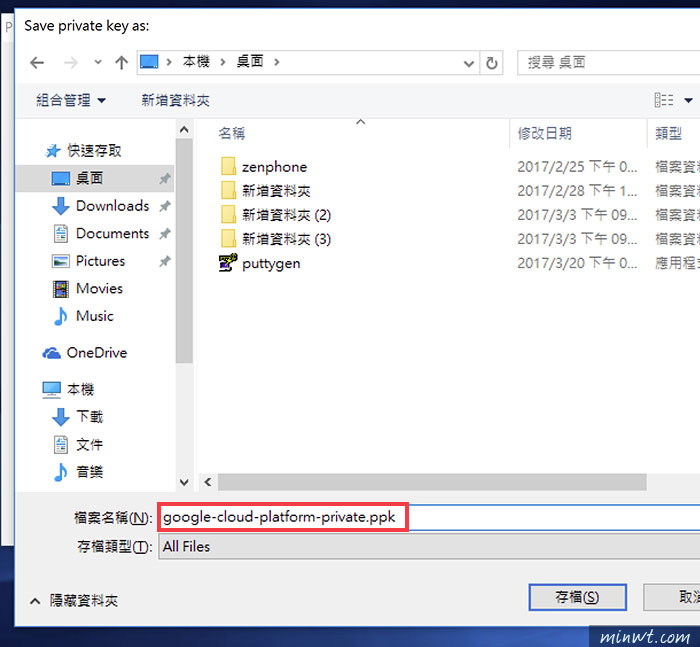
Step7
副檔名為.ppk,再將它儲存起來。
Step8
儲存完畢後,再點左邊的「Save public key」鈕,再儲存一次,這個是公開金鑰,而剛是非公開的。

Step9
都儲存好後,再把PuTTY Key Generator上方的金鑰複製起來。

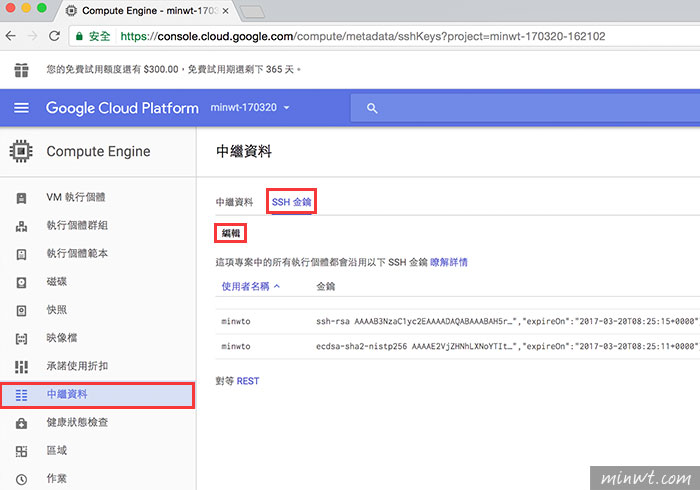
Step10
接著進到Google雲端主機,切到「中繼資料」,再點上方的「SSH金鑰頁籤」,接著再按「編輯」鈕。
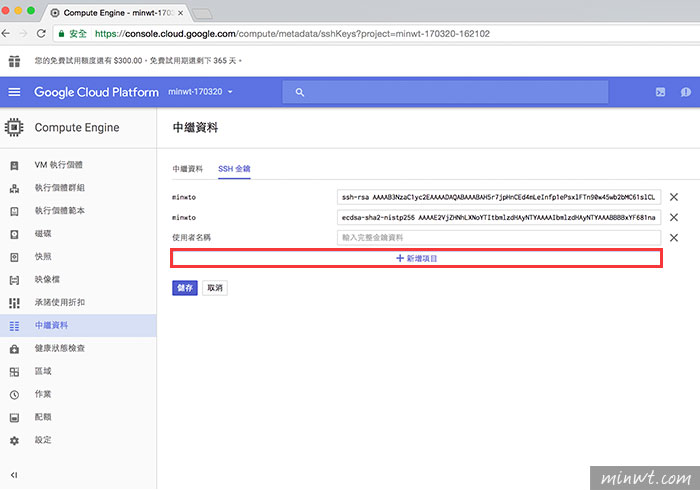
Step11
再點下方的「新增項目」。
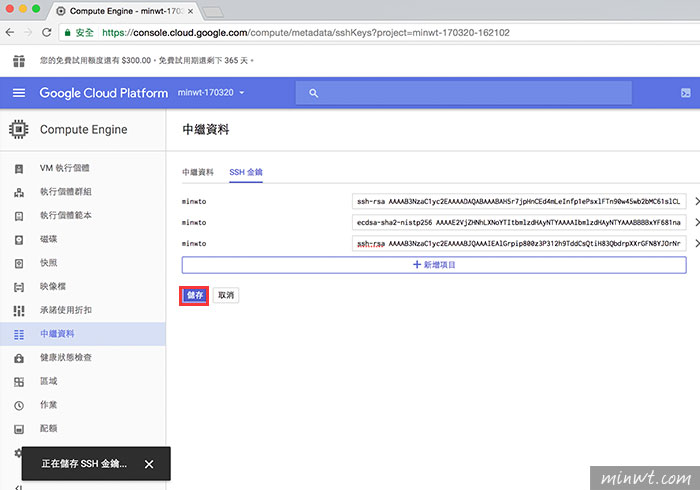
Step12
剛將的金鑰輸入後,再按「儲存」。
Step13
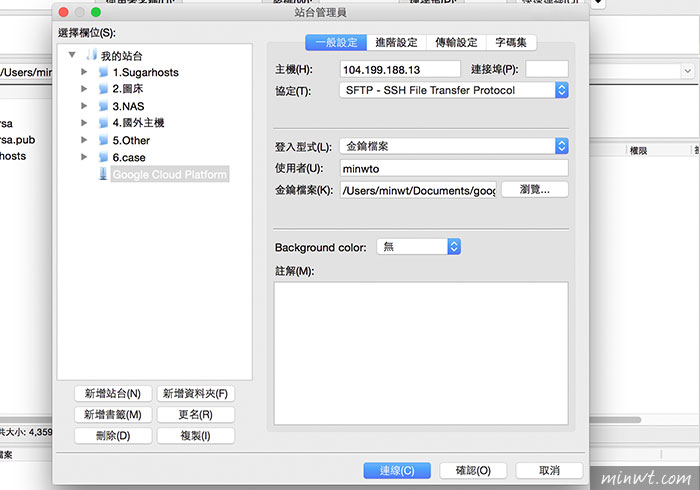
到這其實金鑰的部分已完成了,接著開啟FileZilla,將協定設為SFTP,以及輸入使用者,使用者就是剛的who am i,以及選擇剛所儲存的private金鑰檔案。
Step14
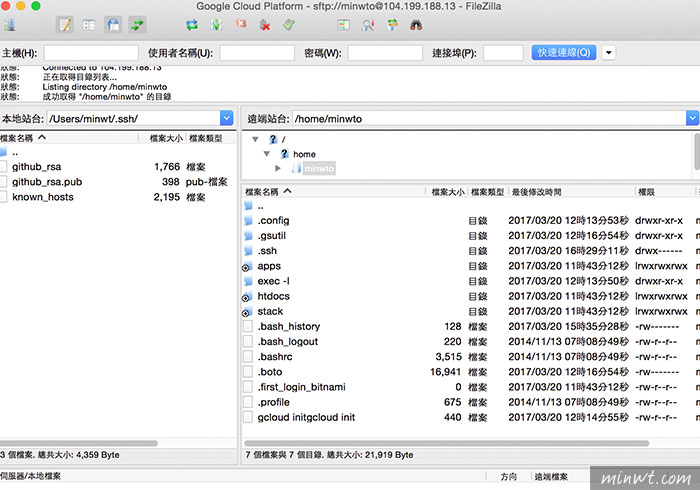
再按下連線後,就可順利的連到Google的雲端主機啦!
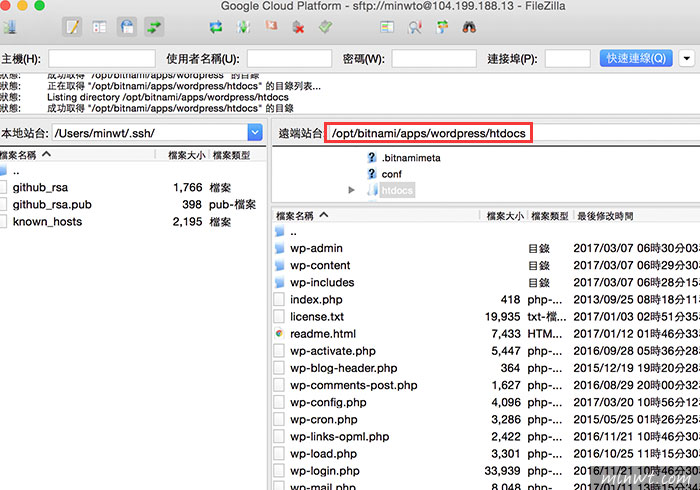
Step15
而wordpress則是放在「bitnami/apps/wordpress/htdocs」,這時就可上傳所需的外掛與所愛的佈景,甚至也可上傳繁中語系的檔案,後台就會變中文啦!有了FTP後就更方便使用啦!因此有興趣的朋友,有一整年的免費用怎能放過,且還是Google的主機,因此無論是穩定度,還是速度都是品質保證。