Search Console
Step1
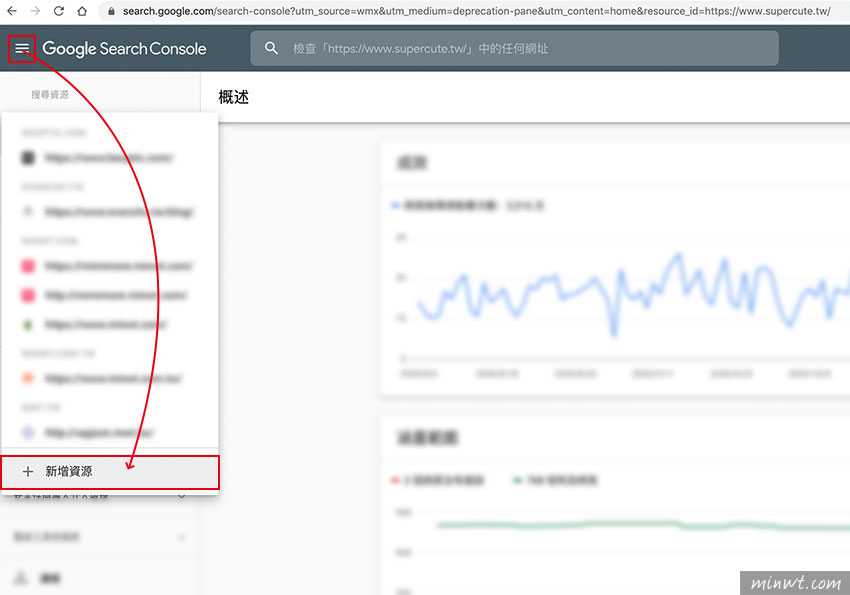
在進入Search Console的管理介面後,點右上的選單圖示,再點「新增資源」。
Step2
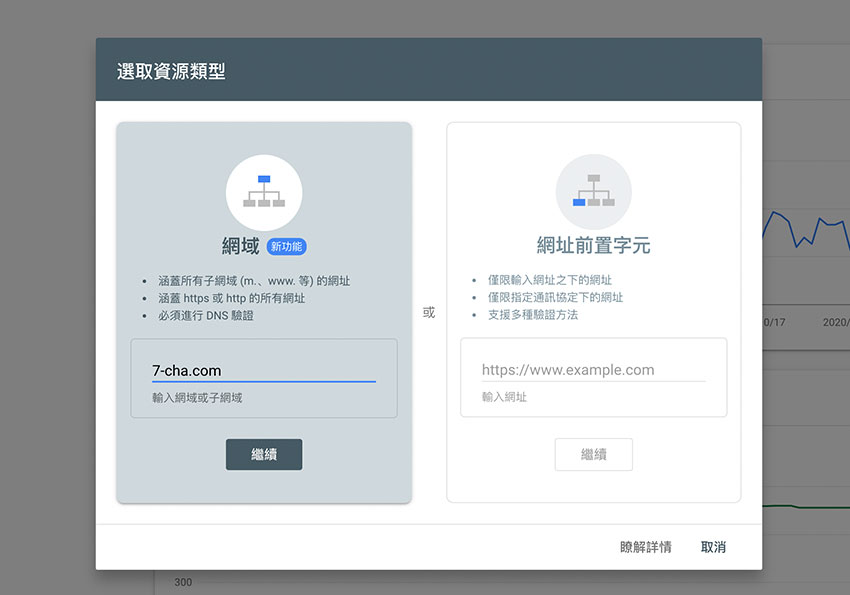
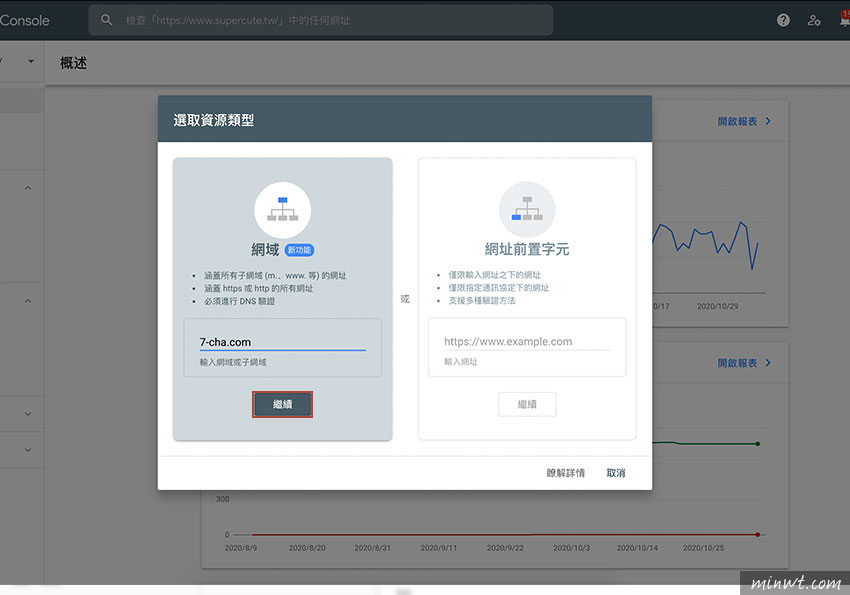
接著將域名輸到左邊的輸入框中,而前方不用加www,只需輸入原始網址就好。
Step3
接著在驗證的地方,只可透過DNS,並將下方的字串給複製起來。
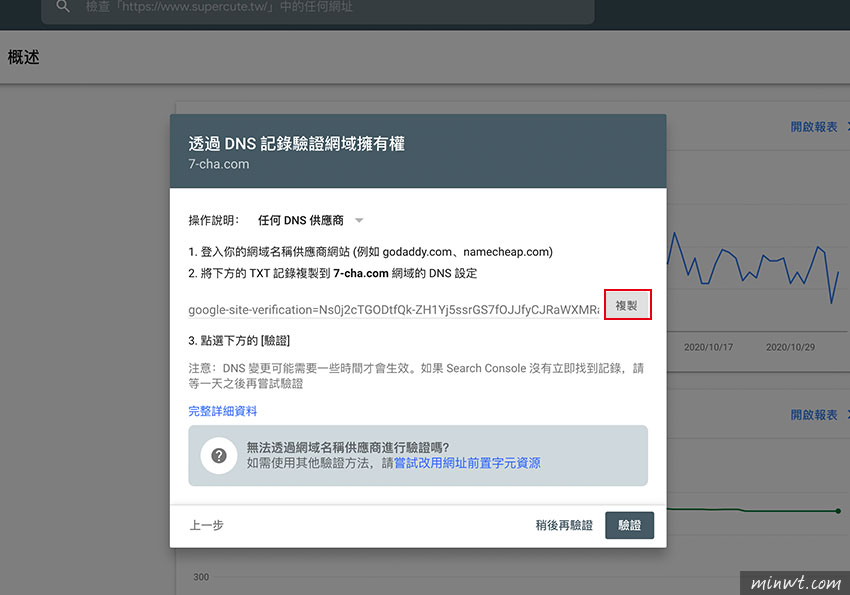
Step4
這邊梅干是用 Cloudflare 作 DNS 管理,切到DNS的設定,新增一個 TXT 類型,名稱除了可打域名也可打@,再把剛的字串,貼到內容的輸入框中。

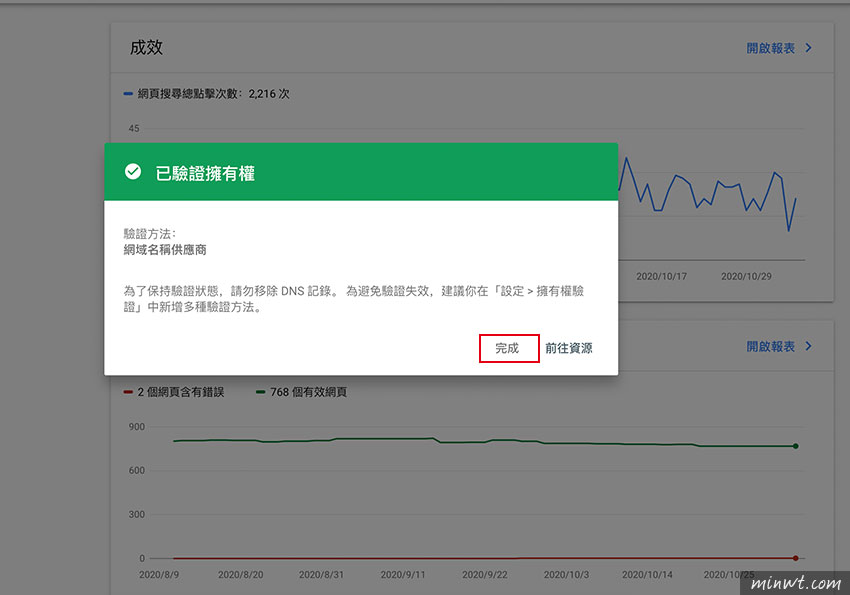
Step5
都設定好後,再回到Step3,按下驗證鈕,當驗證完成後,就會看到綠色的勾勾。
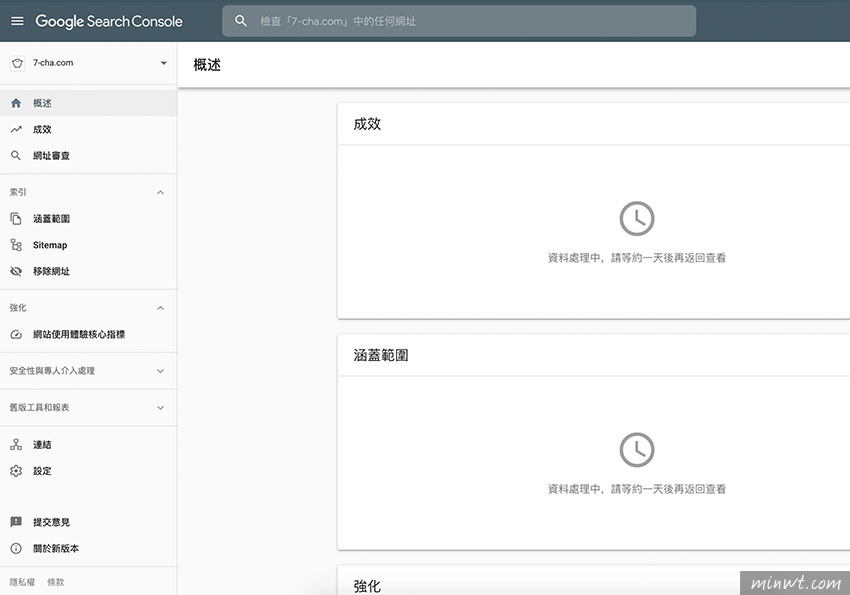
Step6
接著就會進入Search Console的總覽畫面。
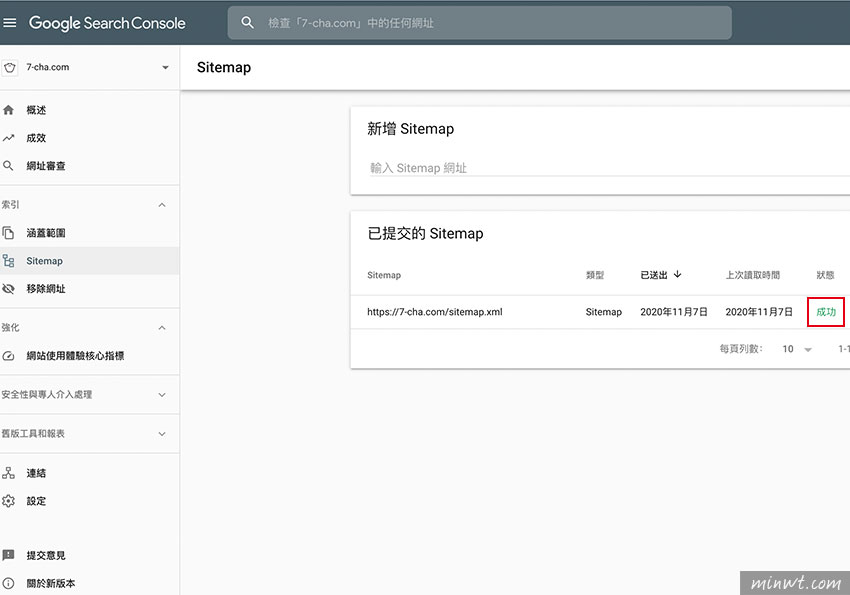
Step7
驗證完畢後,第一件事就是提交網站的Sitemap啦!當提交成功時,在狀態的地方就會出現成功,之後就每隔一段時間,再回來觀察囉!