

Step1
首先先建立一台主機,這邊梅干是選擇GCP中最入門的方案E2。

Step2
在選定好規格後,接著選擇系統,而預設是Debian。
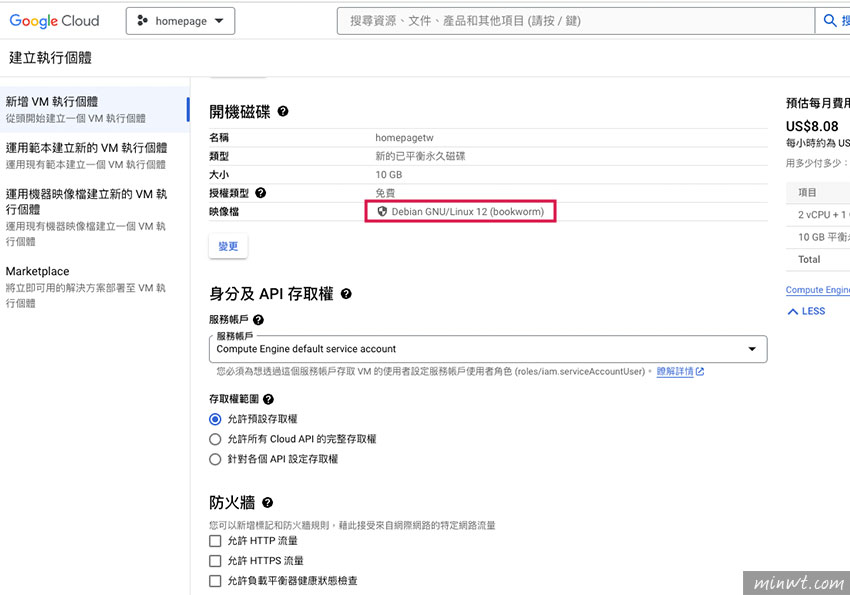
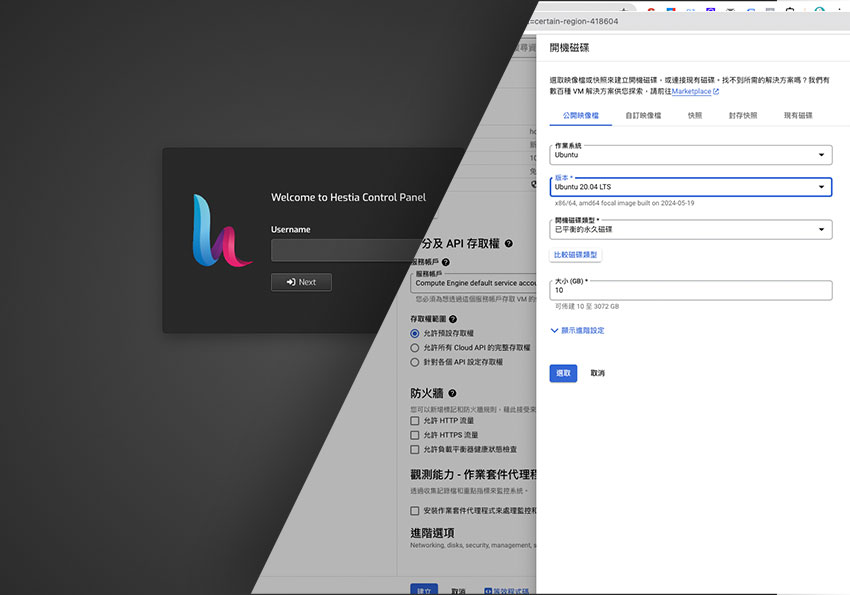
Step3
而梅干習慣用的是系統是Ubuntu。
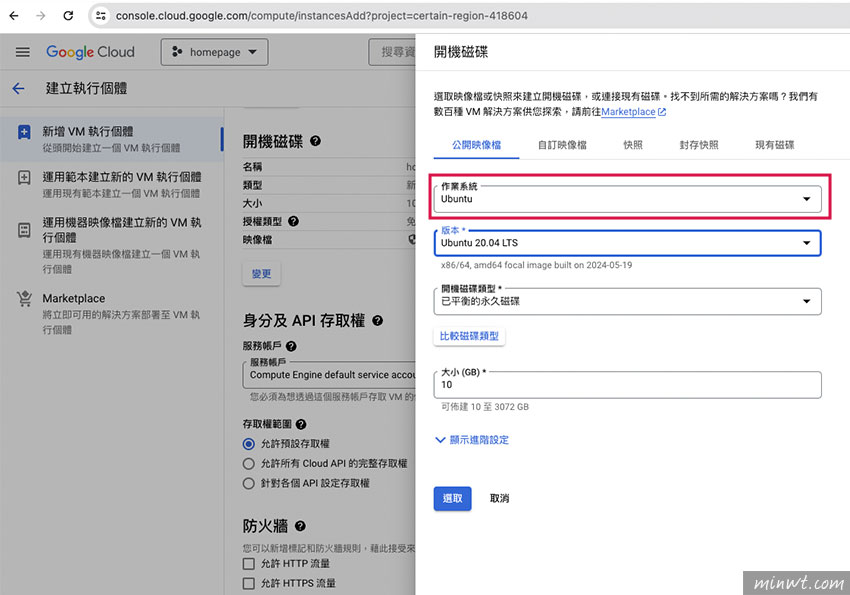
Step4
在選定好規格與系統後,接著將防火牆的HTTP與HTTPS開啟。

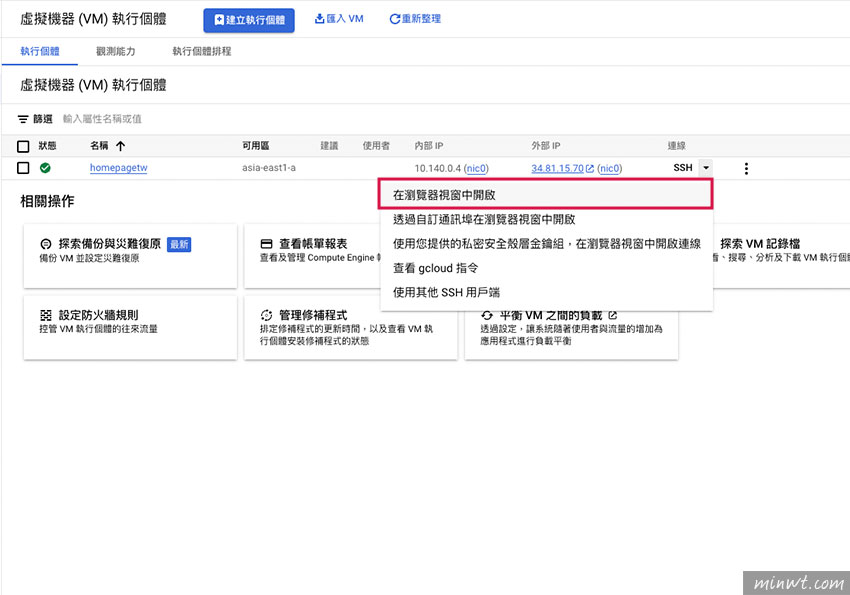
Step5
過一回在主機建立好後,就可點SSH後方的三角形,選擇在「瀏覽器視窗中開啟」。
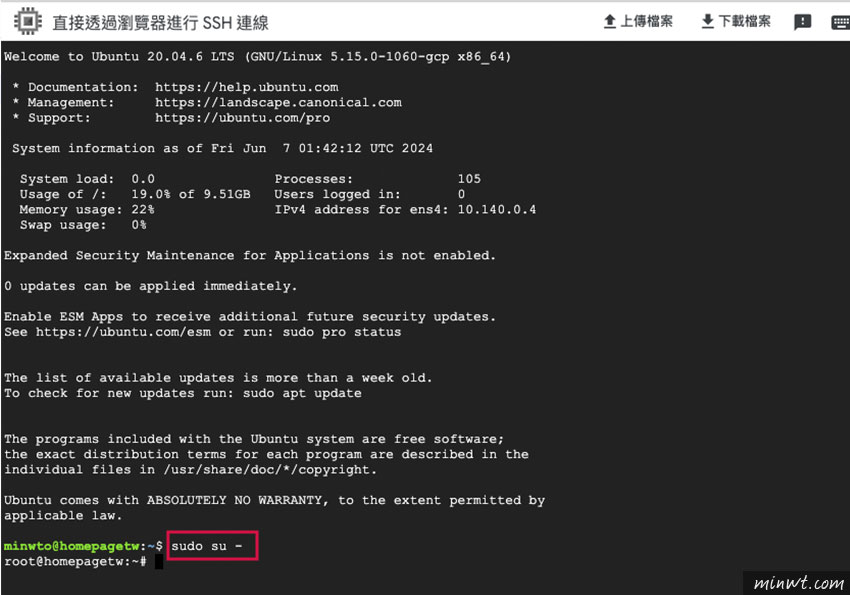
Step6
在登入主機後,輸入sudo su – 。
Step7
接著再輸入下方指令,將hestiacp的程式下載到主機中。
wget https://raw.githubusercontent.com/hestiacp/hestiacp/release/install/hst-install.sh
apt-get update && apt-get install ca-certificates
apt-get update && apt-get install ca-certificates

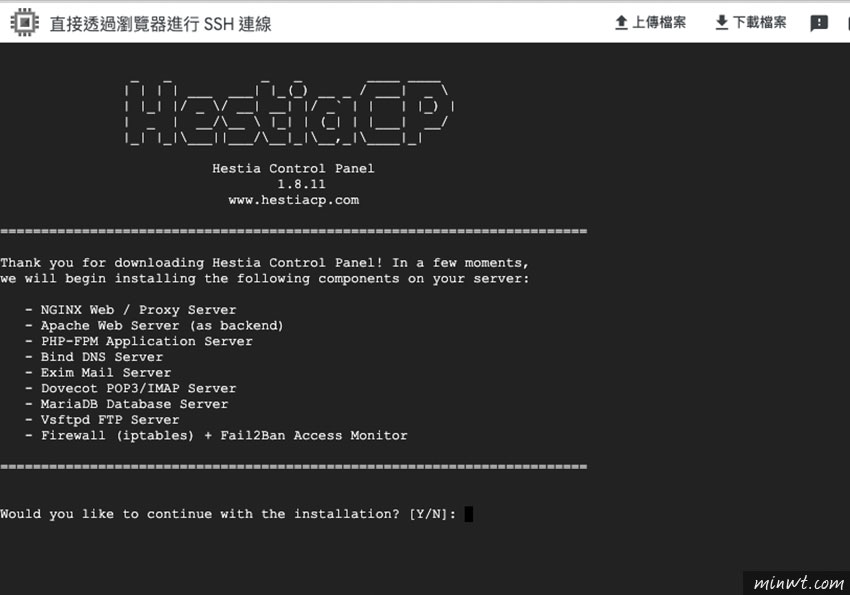
Step8
在下載完畢後,再輸入下方指令,進行安裝,在過程中只需按y與輸入域名,接著就放著給它跑。
bash hst-install.sh
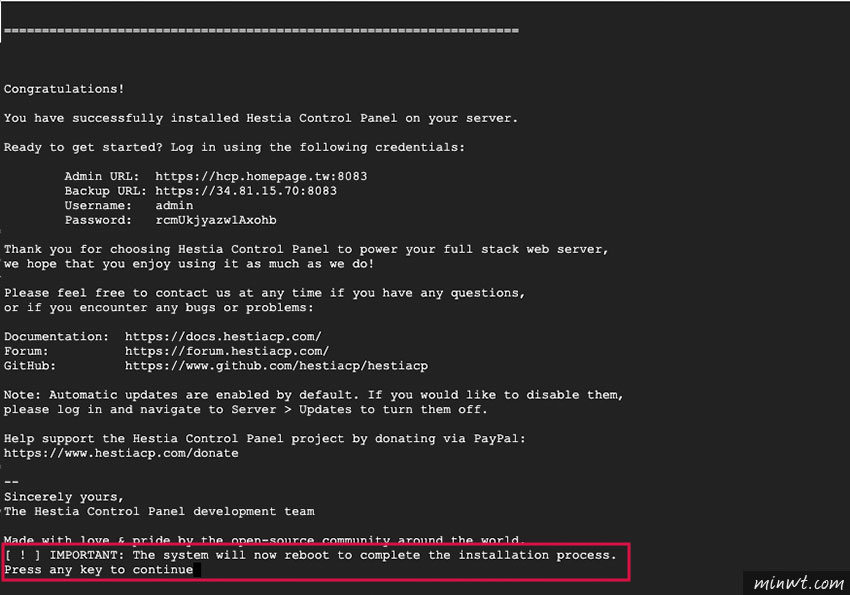
Step9
在安裝完成後,接著任意按一個鍵,重啟主機。
Step10
在重啟的同時,接著再到防火牆設定hestiacp管理介面的埠號。
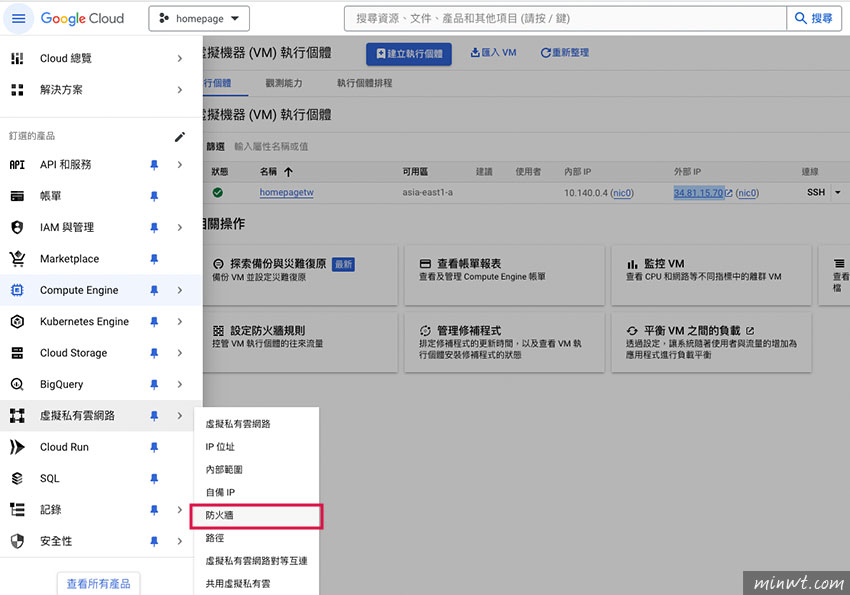
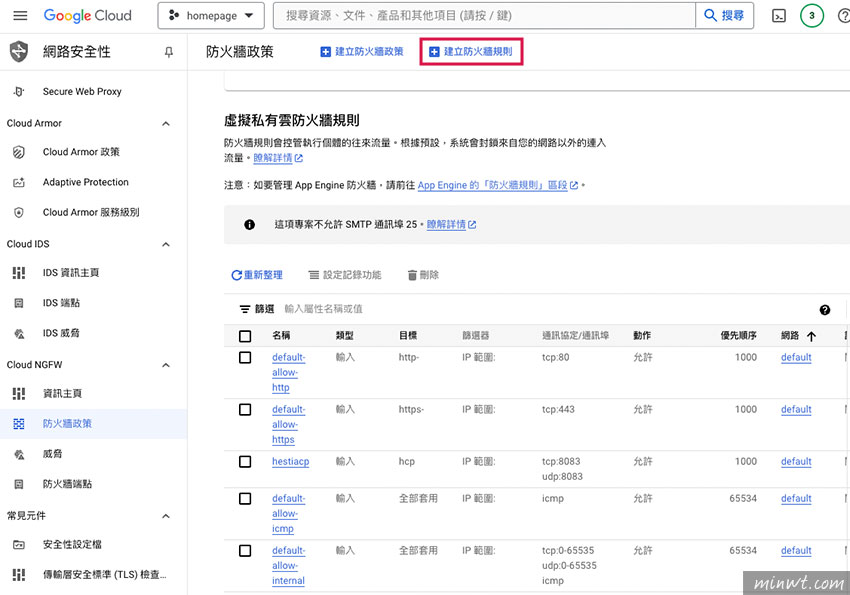
Step11
進入後再點上方的「建立防火牆規則」。
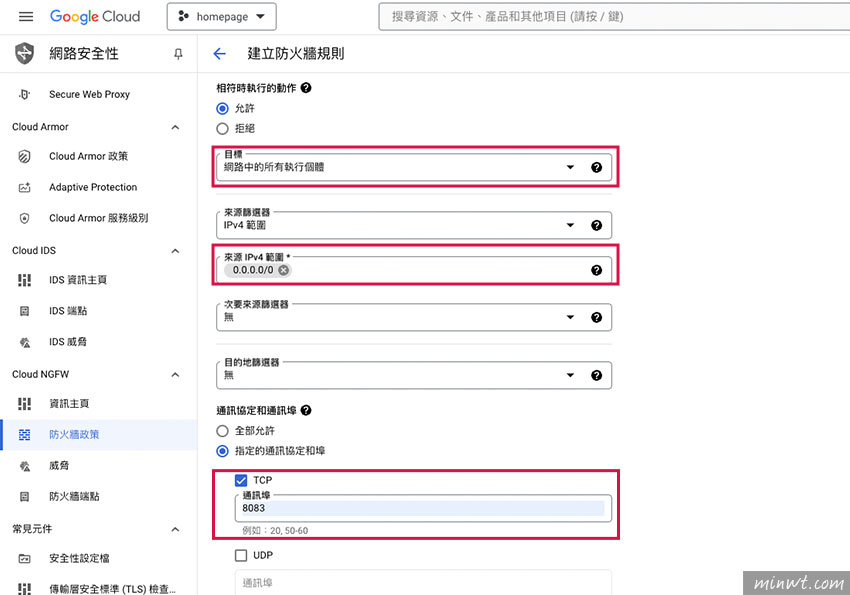
Step12
接著輸入8083。
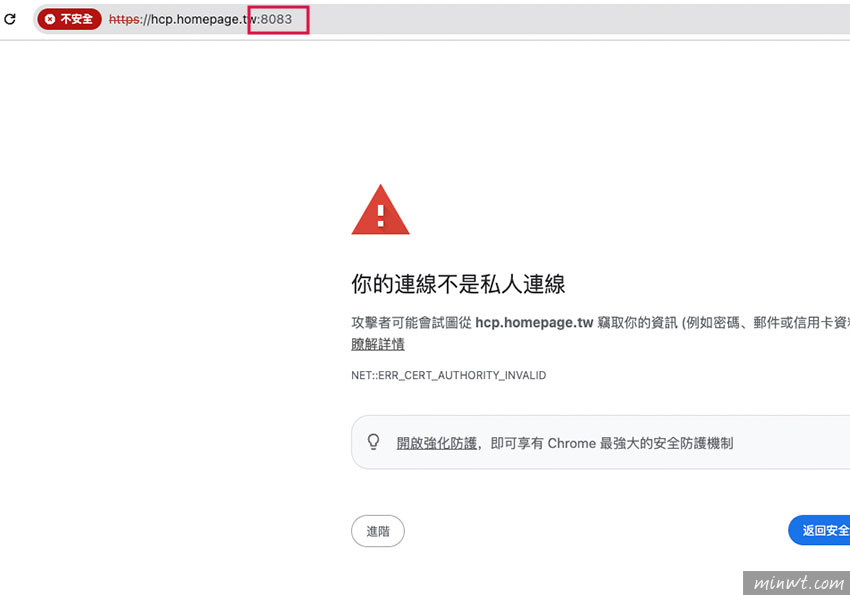
Step13
接著開啟瀏覽器,輸入網址與8083後,再按下方的進階鈕,就可進入登入畫面。
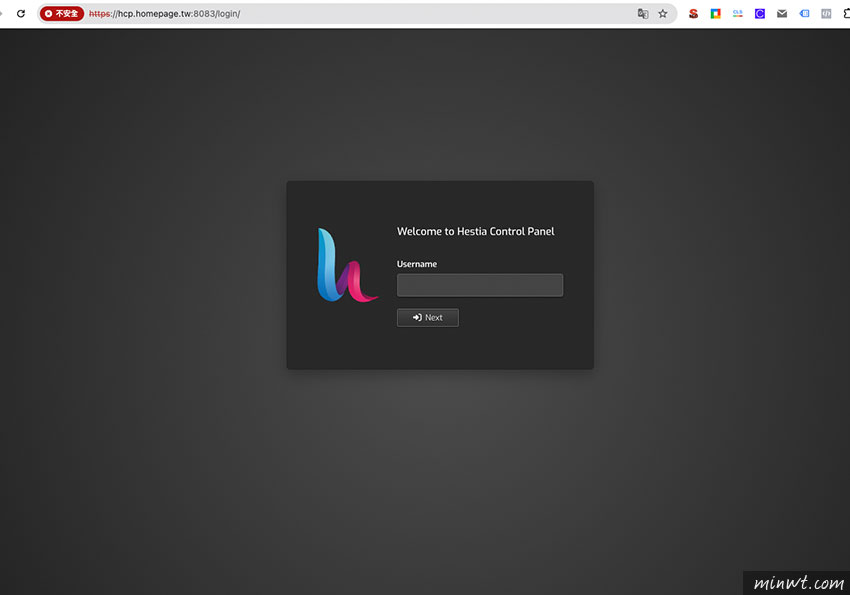
Step14
接著輸入帳號與密碼,就能登入hestiacp的管理後台啦!
Step15
這樣就可順利的登入hestiacp後台。
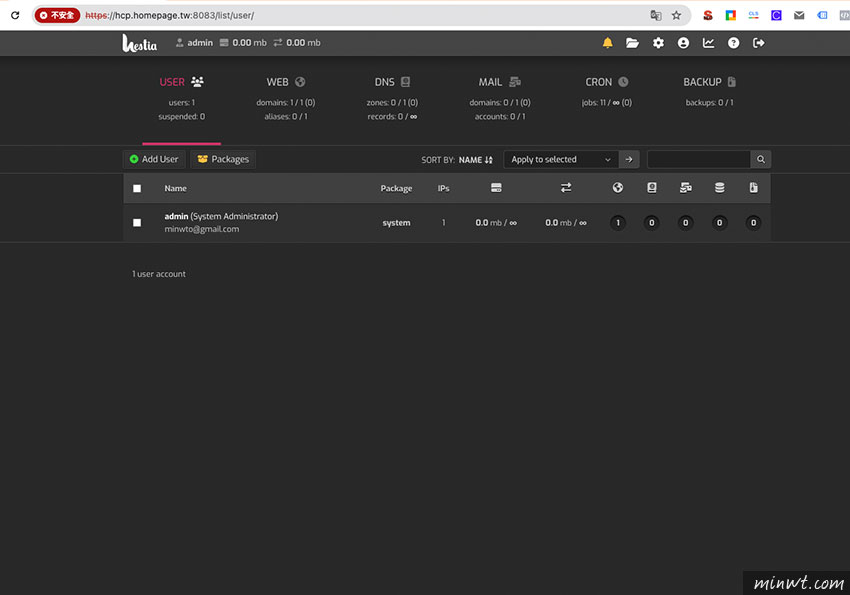
Step16
而hestiacp也可一鍵的安裝WordPress。
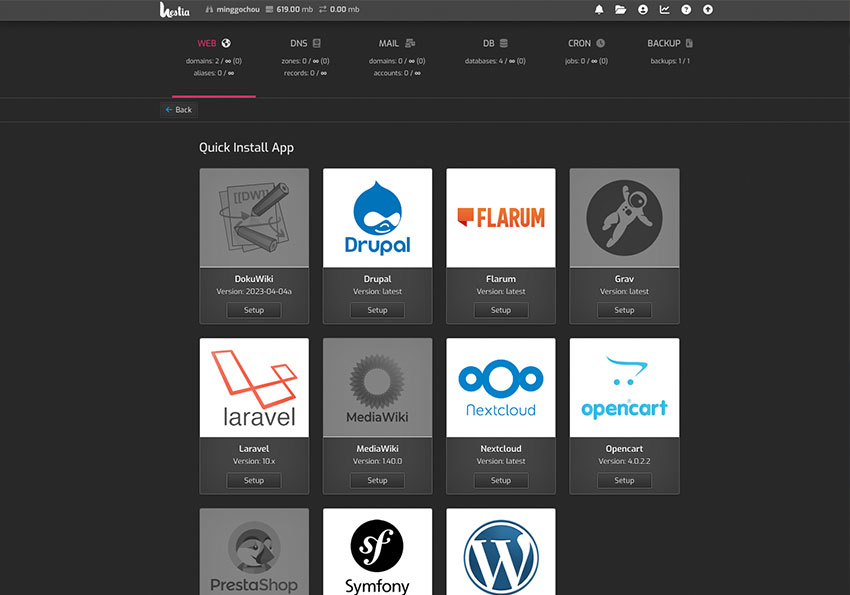
Step17
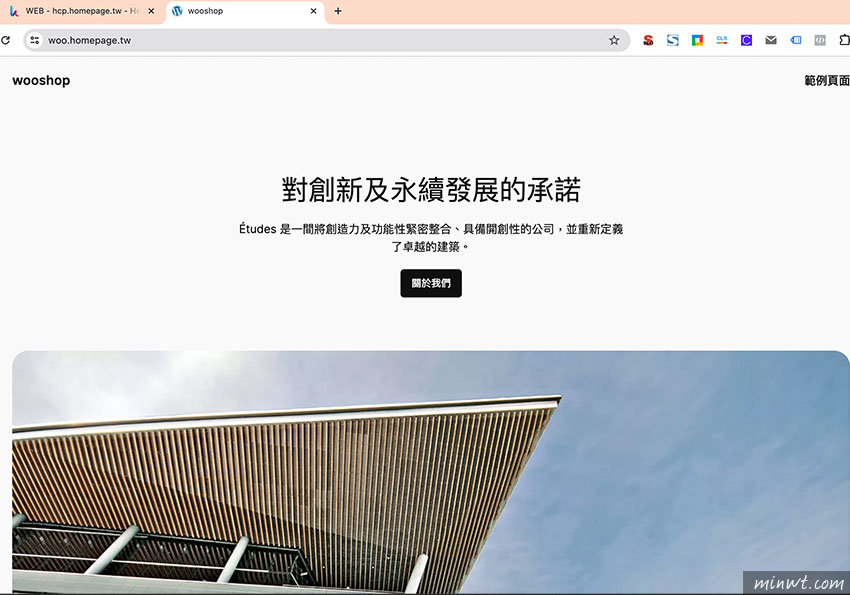
這樣就可快速的安裝起WordPress,以及有圖像式的管理後台啦!因此想用GCP的朋友,不妨也可試試看囉!
更改埠號與密碼(無需加引號)
v-change-user-password admin “new_password"
v-change-sys-port "8080"
v-change-sys-port "8080"